Whipped Shortbread Cookies are not just any treat; they are a bite of pure, melt-in-your-mouth bliss that promises to become a cherished addition to your baking repertoire. Originating from the rich culinary traditions of Scotland, where shortbread has long been celebrated for its simple yet profound buttery goodness, the ‘whipped’ variation elevates this classic to an entirely new level of delicate perfection.
Why do people fall in love with these delightful confections?
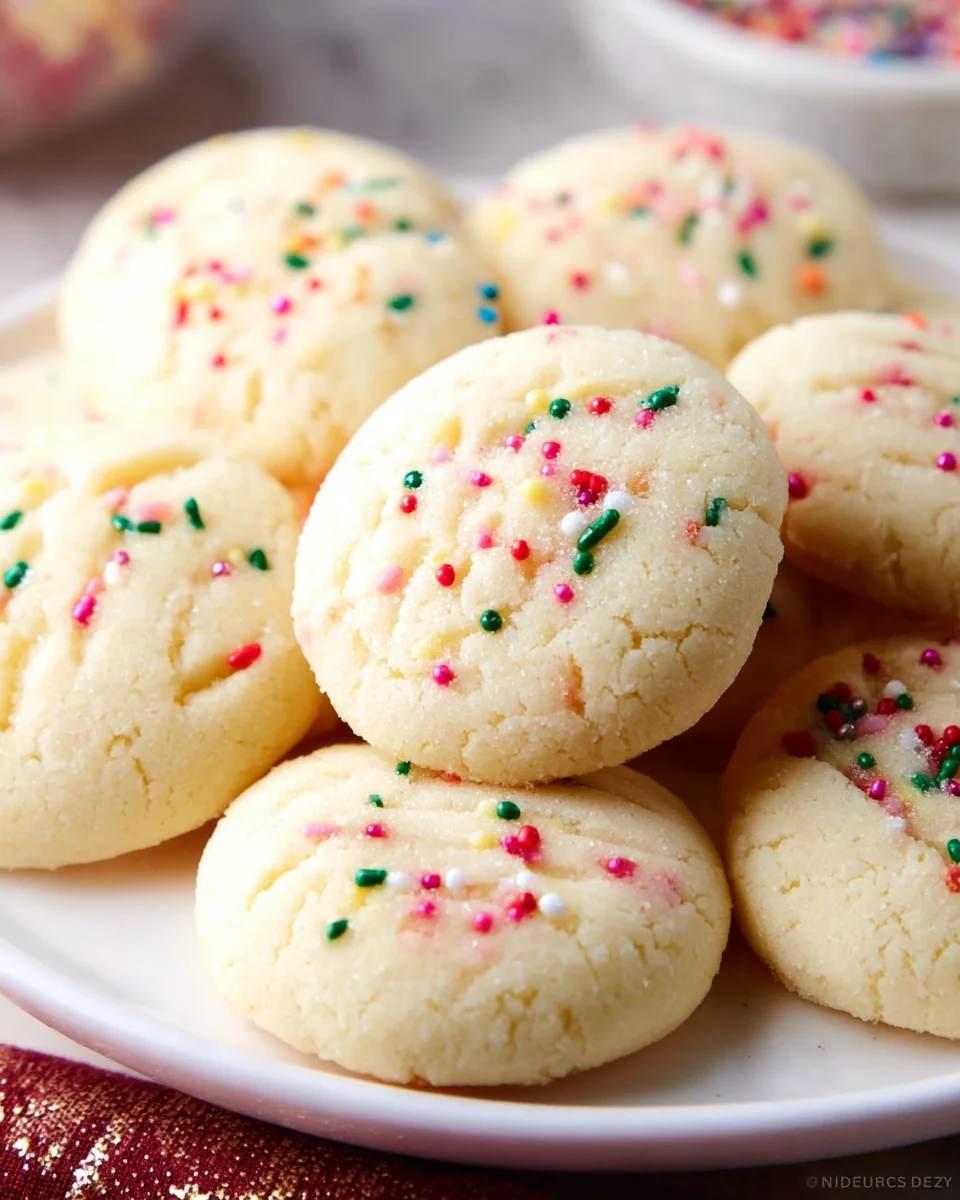
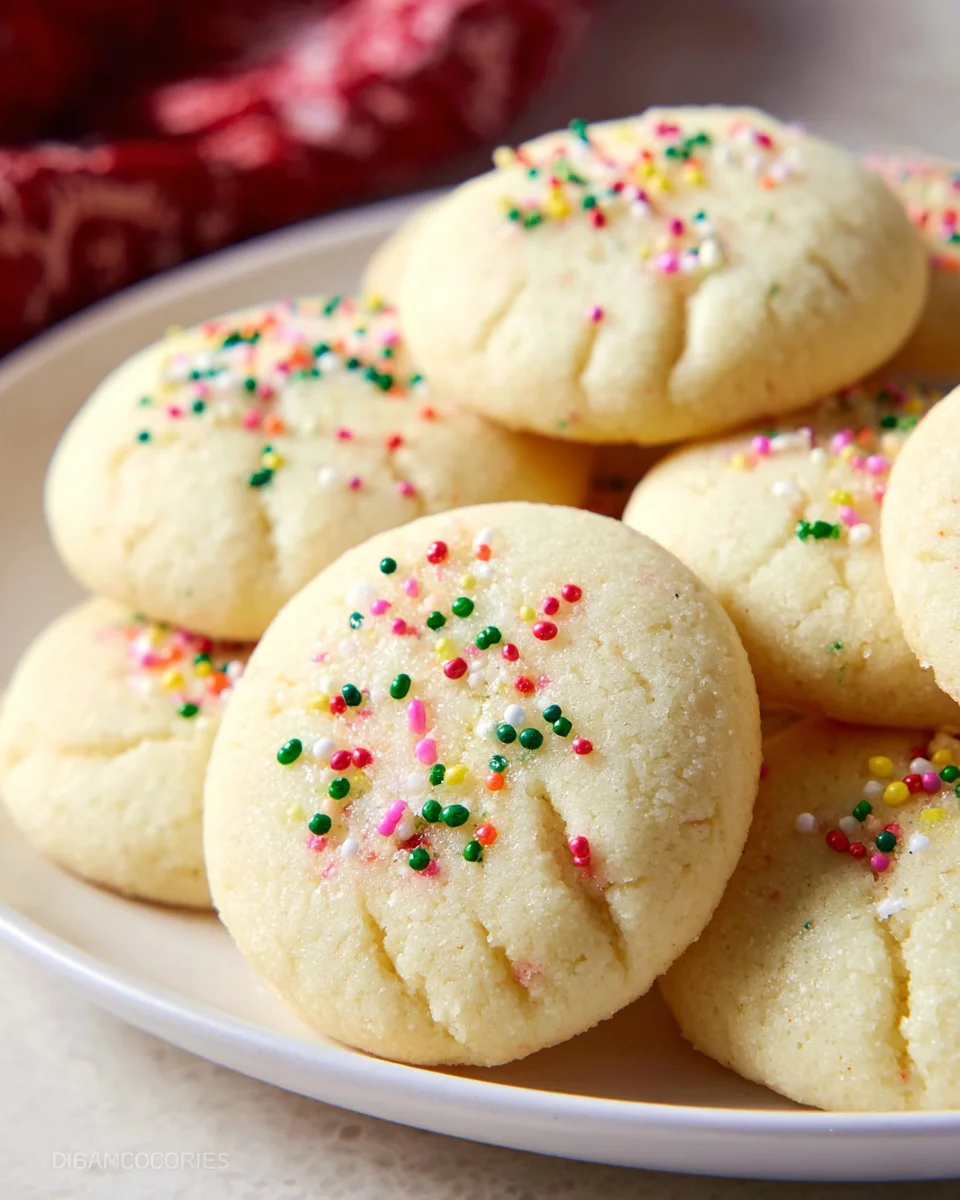
It’s the magical transformation that occurs when butter, sugar, and flour are generously creamed together, incorporating air to create an incredibly light and airy dough. This unique whipping process results in a cookie that practically dissolves on your tongue, leaving behind an intensely rich, sweet, and buttery flavor that is utterly unforgettable. These cookies are remarkably easy to prepare, yet possess an elegance perfect for any holiday gathering or a cozy afternoon tea. Trust me, once you experience the delicate crumb and luxurious taste of homemade Whipped Shortbread Cookies, you’ll understand why they hold such a special place in the hearts of so many.
Ingredients:
- 1 cup (226g) unsalted butter, very soft but not melted. This is absolutely crucial for the characteristic melt-in-your-mouth texture of your Whipped Shortbread Cookies. I like to leave mine out on the counter for at least an hour, sometimes two, depending on the ambient temperature in my kitchen. You want it pliable, easily dented with a finger, but not greasy.
- 1/2 cup (60g) powdered sugar (confectioners’ sugar), sifted. Sifting here is key to prevent lumps and ensure a super smooth dough. It also helps incorporate air more effectively during the creaming process, contributing to that wonderful lightness.
- 1 3/4 cups (210g) all-purpose flour, sifted. Again, sifting is non-negotiable for these delicate cookies. It makes the flour lighter and easier to incorporate without overmixing, which can lead to tough shortbread.
- 1/4 cup (30g) cornstarch (cornflour), sifted. This is one of my secret weapons for incredibly tender shortbread. Cornstarch inhibits gluten development, resulting in a wonderfully crumbly and melt-in-your-mouth texture that is the hallmark of the best Whipped Shortbread Cookies. Don’t skip it!
- 1 teaspoon pure vanilla extract. I always opt for pure vanilla extract over imitation; the flavor difference is truly noticeable and elevates these simple cookies.
- 1/4 teaspoon fine sea salt. A small touch of salt balances the sweetness and enhances all the other flavors in the cookie.
- Optional decorations: sprinkles, sanding sugar, candied cherries, chocolate for dipping, or a light dusting of extra powdered sugar after baking. Have fun with these!
Preparing the Divine Dough: The Heart of Your Whipped Shortbread Cookies
- Get your butter ready: First things first, ensure your butter is genuinely at room temperature – like I mentioned in the ingredients, it should be very soft, almost spreadable, but not melted or oily. This really is the cornerstone of perfect Whipped Shortbread Cookies. If your butter is too cold, it won’t cream properly with the sugar, and you’ll end up with a denser, less airy cookie. If it’s too warm, the dough might become greasy and difficult to work with. I often cut my butter into smaller pieces and let it sit for about an hour or so, just to ensure it reaches that perfect consistency.
- Creaming the butter and sugar: In a large mixing bowl, or the bowl of your stand mixer fitted with the paddle attachment, combine your very soft unsalted butter and the sifted powdered sugar. Begin mixing on low speed to prevent a sugar cloud from forming, then gradually increase to medium-high speed. Now, this is where the “whipped” in Whipped Shortbread Cookies truly comes into play. You need to beat this mixture for a good 5 to 7 minutes, really letting the mixer do its work. What you’re aiming for is a mixture that is incredibly light, pale in color, and remarkably fluffy. It will increase significantly in volume as air is incorporated. Stop and scrape down the sides of the bowl with a rubber spatula frequently to ensure everything is evenly combined. This thorough creaming process creates tiny air pockets, which are essential for the cookie’s delicate structure and famous melt-away texture.
- Adding the flavor: Once your butter and sugar mixture is beautifully light and fluffy, reduce the mixer speed to low and add the pure vanilla extract and the fine sea salt. Mix just until these are fully incorporated, which should only take about 30 seconds. Be careful not to overmix at this stage; we just want to distribute the flavors evenly throughout the creamy base. The vanilla is a simple yet profound addition, lending a comforting warmth that pairs perfectly with the rich butter.
- Sifting the dry ingredients: In a separate, medium-sized bowl, combine your sifted all-purpose flour and the sifted cornstarch. I cannot stress enough the importance of sifting both of these ingredients separately and then again together, if you have the patience. This step removes any lumps and, more importantly, aerates the dry ingredients, making them much lighter. This lightness prevents you from having to overmix the dough later, which can lead to gluten development and a tough cookie – the exact opposite of what we want for these tender Whipped Shortbread Cookies.
- Gently combining wet and dry: With your mixer on the lowest speed, or by hand with a sturdy spatula, gradually add the sifted flour and cornstarch mixture to the wet butter mixture. Add it in two or three batches, mixing just until the flour streaks disappear after each addition. The key here is to mix just until combined. As soon as you no longer see any dry flour, stop mixing. Overmixing will develop the gluten in the flour, making your cookies tough instead of wonderfully crumbly and melt-in-your-mouth. The dough will be very soft, almost like a thick paste, but it should come together. Resist the urge to keep mixing once it looks uniform. Scrape down the bowl one last time to ensure everything is well incorporated. You’ve now got the perfect dough for incredible Whipped Shortbread Cookies!
Shaping Your Masterpieces: Crafting Perfect Whipped Shortbread Cookies
- Preparing your piping bag (recommended method): For classic Whipped Shortbread Cookies with those beautiful, intricate designs, a piping bag fitted with a large star tip (like an Ateco 827 or Wilton 1M) is your best friend. Fit your piping bag with the tip, then stand the bag up in a tall glass and fold the edges over to make it easier to fill. Carefully spoon the soft dough into the piping bag, filling it no more than two-thirds full. This prevents the dough from spilling out the top as you pipe and makes it much easier to handle. Push the dough down towards the tip, gently twisting the top of the bag to create pressure.
- Piping the cookies: Line several baking sheets with parchment paper. Hold the piping bag perpendicular to the baking sheet, about half an inch above the surface. Apply even, steady pressure to pipe your desired shapes – rosettes, S-shapes, simple stars, or even little logs. Aim for cookies that are roughly 1.5 to 2 inches in diameter. Leave about an inch of space between each cookie on the baking sheet, as they will spread ever so slightly during baking. If you find the dough is too soft to hold its shape while piping, you can chill the piped cookies on the baking sheet in the refrigerator for 10-15 minutes before baking. This will help them maintain their sharp definition.
-
Alternative shaping methods (if no piping bag): Don’t have a piping bag? No problem! You can still make delightful Whipped Shortbread Cookies.
- Fork Press: Scoop rounded teaspoons of dough onto your parchment-lined baking sheets. Gently flatten each mound with the tines of a fork, pressing down once or twice in a crosshatch pattern. This gives them a lovely rustic look.
- Roll and Cut: For this method, you might need to chill the dough for about 20-30 minutes to make it firmer. Lightly flour a clean work surface and your rolling pin. Roll the dough out to about 1/4-inch thickness. Use small cookie cutters (round, square, or festive shapes) to cut out your cookies. Carefully transfer them to your prepared baking sheets.
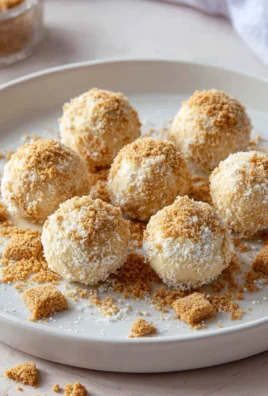
- Hand-rolled Balls: Simply roll the dough into small, uniform balls (about 1-inch diameter) and place them on the baking sheet.
No matter the shaping method, try to make your cookies as uniform in size as possible to ensure even baking.
Baking to Perfection: Achieving that Signature Whipped Shortbread Crumb
- Preheat your oven: Arrange an oven rack in the middle position and preheat your oven to 325°F (160°C). This lower temperature is ideal for shortbread, as it allows the cookies to bake through gently without browning too much. Over-baking or baking at too high a temperature can lead to a dry or hard cookie, which is the opposite of the tender texture we’re going for.
- Baking the cookies: Place one baking sheet at a time into your preheated oven. Bake for approximately 12 to 18 minutes. Baking time can vary depending on your oven and the size and thickness of your cookies, so keep a close eye on them. The trick to perfect Whipped Shortbread Cookies is to bake them until they are set and firm to the touch, but still very pale, almost white, with just the very slightest hint of golden color around the edges. They should definitely not be deeply golden brown. If they are, they’ve likely been overbaked and will lose some of their signature tenderness. The goal is barely golden edges, and a pale, almost ivory center.
- Cooling on the baking sheet: Once baked, remove the baking sheet from the oven. Let the cookies cool on the baking sheet for at least 5 to 10 minutes. Do not try to move them immediately! These cookies are quite delicate when warm, and they need this time to firm up before you transfer them. Rushing this step can lead to breakage.
- Final cooling: After they’ve firmed up slightly on the baking sheet, carefully transfer the Whipped Shortbread Cookies to a wire cooling rack to cool completely. This allows air to circulate all around the cookies, ensuring they cool evenly and preventing any condensation that could make them soggy on the bottom. Ensure they are completely cool before storing or decorating further. This usually takes another 30 minutes to an hour.
Finishing Touches & Storage: Elevating and Preserving Your Whipped Shortbread Cookies
-
Decorating (optional but fun!): Once your Whipped Shortbread Cookies are completely cool, you have a few options for making them even more special.
- Simple Dusting: A light dusting of extra sifted powdered sugar provides an elegant, classic finish. Simply use a small sieve to sprinkle sugar over the cooled cookies.
- Chocolate Dip: Melt some good quality chocolate (dark, milk, or white) in a double boiler or in the microwave in short bursts, stirring until smooth. Dip one end of each cooled cookie into the melted chocolate, letting any excess drip off. You can then sprinkle with chopped nuts, sprinkles, or a contrasting drizzle of white chocolate while the chocolate is still wet. Place on parchment paper to set. This adds a lovely layer of flavor and texture.
- Sprinkles/Sanding Sugar: If you didn’t add them before baking, you can attach sprinkles or sanding sugar using a tiny dab of royal icing or by dipping the cookie into a very thin glaze (powdered sugar mixed with a tiny bit of milk or water). However, for best results with sprinkles, I usually recommend adding them before baking, immediately after piping or shaping.
- Candied Cherries: A classic decoration for shortbread, a small piece of candied red or green cherry pressed into the center of each cookie before baking offers a festive touch and a lovely burst of color.
No matter how you choose to decorate them, these cookies are a true delight!
- Storing your cookies: Whipped Shortbread Cookies store exceptionally well, making them perfect for gifting or making ahead. Once completely cooled (and any decorations are set), store them in an airtight container at room temperature. They will remain wonderfully fresh and crisp for up to 2 weeks. I find that storing them with a piece of parchment paper between layers helps prevent them from sticking together, especially if they are decorated.
- Freezing for later: You can also freeze these cookies! Arrange the completely cooled cookies in a single layer on a baking sheet and freeze until solid (this prevents them from sticking together). Once frozen, transfer them to an airtight freezer-safe container or a heavy-duty freezer bag, separating layers with parchment paper. They will keep well in the freezer for up to 3 months. When you’re ready to enjoy them, simply thaw them at room temperature for a few hours. Freezing is a fantastic way to extend their shelf life and have delicious homemade Whipped Shortbread Cookies on hand whenever a craving strikes or unexpected guests arrive. The texture holds up beautifully after thawing.
- Embrace the simplicity: Remember, the beauty of these Whipped Shortbread Cookies lies in their simple ingredients and melt-in-your-mouth texture. Don’t be afraid to experiment with slight variations, like adding a tiny touch of almond extract instead of, or in addition to, vanilla for a different flavor profile, or a hint of citrus zest. But at their core, these are perfect just as they are – buttery, tender, and incredibly satisfying. Enjoy the process of making them, and even more, enjoy sharing these delightful treats!
I hope you have an absolutely wonderful time making these Whipped Shortbread Cookies. They truly are a timeless classic, and I promise, once you taste that delicate, buttery, melt-in-your-mouth goodness, you’ll understand why they’re so beloved. Happy baking!
Ingredients:
- 1 cup (226g) unsalted butter, very soft but not melted. This is absolutely crucial for the characteristic melt-in-your-mouth texture of your Whipped Shortbread Cookies. I like to leave mine out on the counter for at least an hour, sometimes two, depending on the ambient temperature in my kitchen. You want it pliable, easily dented with a finger, but not greasy.
- 1/2 cup (60g) powdered sugar (confectioners’ sugar), sifted. Sifting here is key to prevent lumps and ensure a super smooth dough. It also helps incorporate air more effectively during the creaming process, contributing to that wonderful lightness.
- 1 3/4 cups (210g) all-purpose flour, sifted. Again, sifting is non-negotiable for these delicate cookies. It makes the flour lighter and easier to incorporate without overmixing, which can lead to tough shortbread.
- 1/4 cup (30g) cornstarch (cornflour), sifted. This is one of my secret weapons for incredibly tender shortbread. Cornstarch inhibits gluten development, resulting in a wonderfully crumbly and melt-in-your-mouth texture that is the hallmark of the best Whipped Shortbread Cookies. Don’t skip it!
- 1 teaspoon pure vanilla extract. I always opt for pure vanilla extract over imitation; the flavor difference is truly noticeable and elevates these simple cookies.
- 1/4 teaspoon fine sea salt. A small touch of salt balances the sweetness and enhances all the other flavors in the cookie.
- Optional decorations: sprinkles, sanding sugar, candied cherries, chocolate for dipping, or a light dusting of extra powdered sugar after baking. Have fun with these!
Preparing the Divine Dough: The Heart of Your Whipped Shortbread Cookies
- Get your butter ready: First things first, ensure your butter is genuinely at room temperature – like I mentioned in the ingredients, it should be very soft, almost spreadable, but not melted or oily. This really is the cornerstone of perfect Whipped Shortbread Cookies. If your butter is too cold, it won’t cream properly with the sugar, and you’ll end up with a denser, less airy cookie. If it’s too warm, the dough might become greasy and difficult to work with. I often cut my butter into smaller pieces and let it sit for about an hour or so, just to ensure it reaches that perfect consistency.
- Creaming the butter and sugar: In a large mixing bowl, or the bowl of your stand mixer fitted with the paddle attachment, combine your very soft unsalted butter and the sifted powdered sugar. Begin mixing on low speed to prevent a sugar cloud from forming, then gradually increase to medium-high speed. Now, this is where the “whipped” in Whipped Shortbread Cookies truly comes into play. You need to beat this mixture for a good 5 to 7 minutes, really letting the mixer do its work. What you’re aiming for is a mixture that is incredibly light, pale in color, and remarkably fluffy. It will increase significantly in volume as air is incorporated. Stop and scrape down the sides of the bowl with a rubber spatula frequently to ensure everything is evenly combined. This thorough creaming process creates tiny air pockets, which are essential for the cookie’s delicate structure and famous melt-away texture.
- Adding the flavor: Once your butter and sugar mixture is beautifully light and fluffy, reduce the mixer speed to low and add the pure vanilla extract and the fine sea salt. Mix just until these are fully incorporated, which should only take about 30 seconds. Be careful not to overmix at this stage; we just want to distribute the flavors evenly throughout the creamy base. The vanilla is a simple yet profound addition, lending a comforting warmth that pairs perfectly with the rich butter.
- Sifting the dry ingredients: In a separate, medium-sized bowl, combine your sifted all-purpose flour and the sifted cornstarch. I cannot stress enough the importance of sifting both of these ingredients separately and then again together, if you have the patience. This step removes any lumps and, more importantly, aerates the dry ingredients, making them much lighter. This lightness prevents you from having to overmix the dough later, which can lead to gluten development and a tough cookie – the exact opposite of what we want for these tender Whipped Shortbread Cookies.
- Gently combining wet and dry: With your mixer on the lowest speed, or by hand with a sturdy spatula, gradually add the sifted flour and cornstarch mixture to the wet butter mixture. Add it in two or three batches, mixing just until the flour streaks disappear after each addition. The key here is to mix just until combined. As soon as you no longer see any dry flour, stop mixing. Overmixing will develop the gluten in the flour, making your cookies tough instead of wonderfully crumbly and melt-in-your-mouth. The dough will be very soft, almost like a thick paste, but it should come together. Resist the urge to keep mixing once it looks uniform. Scrape down the bowl one last time to ensure everything is well incorporated. You’ve now got the perfect dough for incredible Whipped Shortbread Cookies!
Shaping Your Masterpieces: Crafting Perfect Whipped Shortbread Cookies
- Preparing your piping bag (recommended method): For classic Whipped Shortbread Cookies with those beautiful, intricate designs, a piping bag fitted with a large star tip (like an Ateco 827 or Wilton 1M) is your best friend. Fit your piping bag with the tip, then stand the bag up in a tall glass and fold the edges over to make it easier to fill. Carefully spoon the soft dough into the piping bag, filling it no more than two-thirds full. This prevents the dough from spilling out the top as you pipe and makes it much easier to handle. Push the dough down towards the tip, gently twisting the top of the bag to create pressure.
- Piping the cookies: Line several baking sheets with parchment paper. Hold the piping bag perpendicular to the baking sheet, about half an inch above the surface. Apply even, steady pressure to pipe your desired shapes – rosettes, S-shapes, simple stars, or even little logs. Aim for cookies that are roughly 1.5 to 2 inches in diameter. Leave about an inch of space between each cookie on the baking sheet, as they will spread ever so slightly during baking. If you find the dough is too soft to hold its shape while piping, you can chill the piped cookies on the baking sheet in the refrigerator for 10-15 minutes before baking. This will help them maintain their sharp definition.
-
Alternative shaping methods (if no piping bag): Don’t have a piping bag? No problem! You can still make delightful Whipped Shortbread Cookies.
- Fork Press: Scoop rounded teaspoons of dough onto your parchment-lined baking sheets. Gently flatten each mound with the tines of a fork, pressing down once or twice in a crosshatch pattern. This gives them a lovely rustic look.
- Roll and Cut: For this method, you might need to chill the dough for about 20-30 minutes to make it firmer. Lightly flour a clean work surface and your rolling pin. Roll the dough out to about 1/4-inch thickness. Use small cookie cutters (round, square, or festive shapes) to cut out your cookies. Carefully transfer them to your prepared baking sheets.
- Hand-rolled Balls: Simply roll the dough into small, uniform balls (about 1-inch diameter) and place them on the baking sheet.
No matter the shaping method, try to make your cookies as uniform in size as possible to ensure even baking.
Baking to Perfection: Achieving that Signature Whipped Shortbread Crumb
- Preheat your oven: Arrange an oven rack in the middle position and preheat your oven to 325°F (160°C). This lower temperature is ideal for shortbread, as it allows the cookies to bake through gently without browning too much. Over-baking or baking at too high a temperature can lead to a dry or hard cookie, which is the opposite of the tender texture we’re going for.
- Baking the cookies: Place one baking sheet at a time into your preheated oven. Bake for approximately 12 to 18 minutes. Baking time can vary depending on your oven and the size and thickness of your cookies, so keep a close eye on them. The trick to perfect Whipped Shortbread Cookies is to bake them until they are set and firm to the touch, but still very pale, almost white, with just the very slightest hint of golden color around the edges. They should definitely not be deeply golden brown. If they are, they’ve likely been overbaked and will lose some of their signature tenderness. The goal is barely golden edges, and a pale, almost ivory center.
- Cooling on the baking sheet: Once baked, remove the baking sheet from the oven. Let the cookies cool on the baking sheet for at least 5 to 10 minutes. Do not try to move them immediately! These cookies are quite delicate when warm, and they need this time to firm up before you transfer them. Rushing this step can lead to breakage.
- Final cooling: After they’ve firmed up slightly on the baking sheet, carefully transfer the Whipped Shortbread Cookies to a wire cooling rack to cool completely. This allows air to circulate all around the cookies, ensuring they cool evenly and preventing any condensation that could make them soggy on the bottom. Ensure they are completely cool before storing or decorating further. This usually takes another 30 minutes to an hour.
Finishing Touches & Storage: Elevating and Preserving Your Whipped Shortbread Cookies
-
Decorating (optional but fun!): Once your Whipped Shortbread Cookies are completely cool, you have a few options for making them even more special.
- Simple Dusting: A light dusting of extra sifted powdered sugar provides an elegant, classic finish. Simply use a small sieve to sprinkle sugar over the cooled cookies.
- Chocolate Dip: Melt some good quality chocolate (dark, milk, or white) in a double boiler or in the microwave in short bursts, stirring until smooth. Dip one end of each cooled cookie into the melted chocolate, letting any excess drip off. You can then sprinkle with chopped nuts, sprinkles, or a contrasting drizzle of white chocolate while the chocolate is still wet. Place on parchment paper to set. This adds a lovely layer of flavor and texture.
- Sprinkles/Sanding Sugar: If you didn’t add them before baking, you can attach sprinkles or sanding sugar using a tiny dab of royal icing or by dipping the cookie into a very thin glaze (powdered sugar mixed with a tiny bit of milk or water). However, for best results with sprinkles, I usually recommend adding them before baking, immediately after piping or shaping.
- Candied Cherries: A classic decoration for shortbread, a small piece of candied red or green cherry pressed into the center of each cookie before baking offers a festive touch and a lovely burst of color.
No matter how you choose to decorate them, these cookies are a true delight!
- Storing your cookies: Whipped Shortbread Cookies store exceptionally well, making them perfect for gifting or making ahead. Once completely cooled (and any decorations are set), store them in an airtight container at room temperature. They will remain wonderfully fresh and crisp for up to 2 weeks. I find that storing them with a piece of parchment paper between layers helps prevent them from sticking together, especially if they are decorated.
- Freezing for later: You can also freeze these cookies! Arrange the completely cooled cookies in a single layer on a baking sheet and freeze until solid (this prevents them from sticking together). Once frozen, transfer them to an airtight freezer-safe container or a heavy-duty freezer bag, separating layers with parchment paper. They will keep well in the freezer for up to 3 months. When you’re ready to enjoy them, simply thaw them at room temperature for a few hours. Freezing is a fantastic way to extend their shelf life and have delicious homemade Whipped Shortbread Cookies on hand whenever a craving strikes or unexpected guests arrive. The texture holds up beautifully after thawing.
- Embrace the simplicity: Remember, the beauty of these Whipped Shortbread Cookies lies in their simple ingredients and melt-in-your-mouth texture. Don’t be afraid to experiment with slight variations, like adding a tiny touch of almond extract instead of, or in addition to, vanilla for a different flavor profile, or a hint of citrus zest. But at their core, these are perfect just as they are – buttery, tender, and incredibly satisfying. Enjoy the process of making them, and even more, enjoy sharing these delightful treats!
I hope you have an absolutely wonderful time making these Whipped Shortbread Cookies. They truly are a timeless classic, and I promise, once you taste that delicate, buttery, melt-in-your-mouth goodness, you’ll understand why they’re so beloved. Happy baking!
Conclusion:
Well, my friends, we’ve reached the sweet finale of our baking journey, and I genuinely hope you’re as excited as I am about the prospect of these incredible treats. If you’re looking for a cookie that truly melts in your mouth, a delicate balance of buttery richness and a tender crumb, then these are undeniably a must-try. I can’t stress enough how delightfully simple yet profoundly satisfying this recipe is. The magic truly happens with the whipping of the butter and sugar, transforming humble ingredients into something ethereal. You’ll find that making these is not just baking; it’s an experience of creating pure joy. Every single bite of these homemade Whipped Shortbread Cookies is a testament to the fact that sometimes, the simplest recipes yield the most spectacular results. They are light, crisp, and possess that unmistakable rich butter flavor that sets truly great shortbread apart from the rest. They manage to be both comforting and elegant, a rare combination in the world of baked goods, making them perfect for any occasion, from a casual afternoon snack to a sophisticated dessert platter.
Now, let’s talk about how to enjoy these beauties. While they are absolutely perfect on their own, perhaps with a cup of your favorite tea or coffee, their versatility truly shines. Imagine them as part of a charming afternoon tea spread, nestled amongst other delicate pastries. For a touch of festive flair, consider dipping half of each cooled cookie in melted dark or white chocolate and sprinkling with a little sea salt or colorful sprinkles – a delightful contrast to the buttery sweetness. You could also gently dust them with powdered sugar just before serving, creating a snowy, elegant look that’s always impressive. Feeling adventurous? Try incorporating a hint of almond extract or a touch of lemon zest into the dough for a different, yet equally enchanting, flavor profile. Crushed pistachios or finely chopped candied ginger can also be folded into the dough for added texture and a burst of exotic taste. They also make a truly thoughtful homemade gift, beautifully packaged in a decorative tin or box, guaranteed to bring a smile to anyone’s face. Trust me, once you master the basic recipe, the possibilities for customization are endless, allowing you to put your own unique spin on these delightful treats and make them entirely your own.
So, what are you waiting for? I wholeheartedly encourage you to roll up your sleeves, gather your ingredients, and embark on this wonderful baking adventure. You’ll be amazed at how easily you can create such a sophisticated and delicious cookie right in your own kitchen. There’s nothing quite like the aroma of freshly baked shortbread filling your home, promising warmth and comfort. And when you do, please don’t keep it a secret! I would absolutely love to hear about your experience. Did you add any unique twists? How did your family and friends react to these buttery wonders? Share your baking triumphs, your photos, and your feedback with me and our community. Let’s celebrate the joy of baking together, one delicious, melt-in-your-mouth cookie at a time. Happy baking, everyone!
Whipped Shortbread Cookies: Easy Melt-in-Your-Mouth Recipe
Whipped Shortbread Cookies are a pure, melt-in-your-mouth delight, elevating the classic Scottish shortbread with a unique whipping process that incorporates air for an incredibly light and airy dough. Easy to prepare, these elegant cookies are perfect for any occasion.
Ingredients
Instructions
Important Information
Nutrition Facts (Per Serving)
It is important to consider this information as approximate and not to use it as definitive health advice.
Allergy Information
Please check ingredients for potential allergens and consult a health professional if in doubt.


Leave a Comment