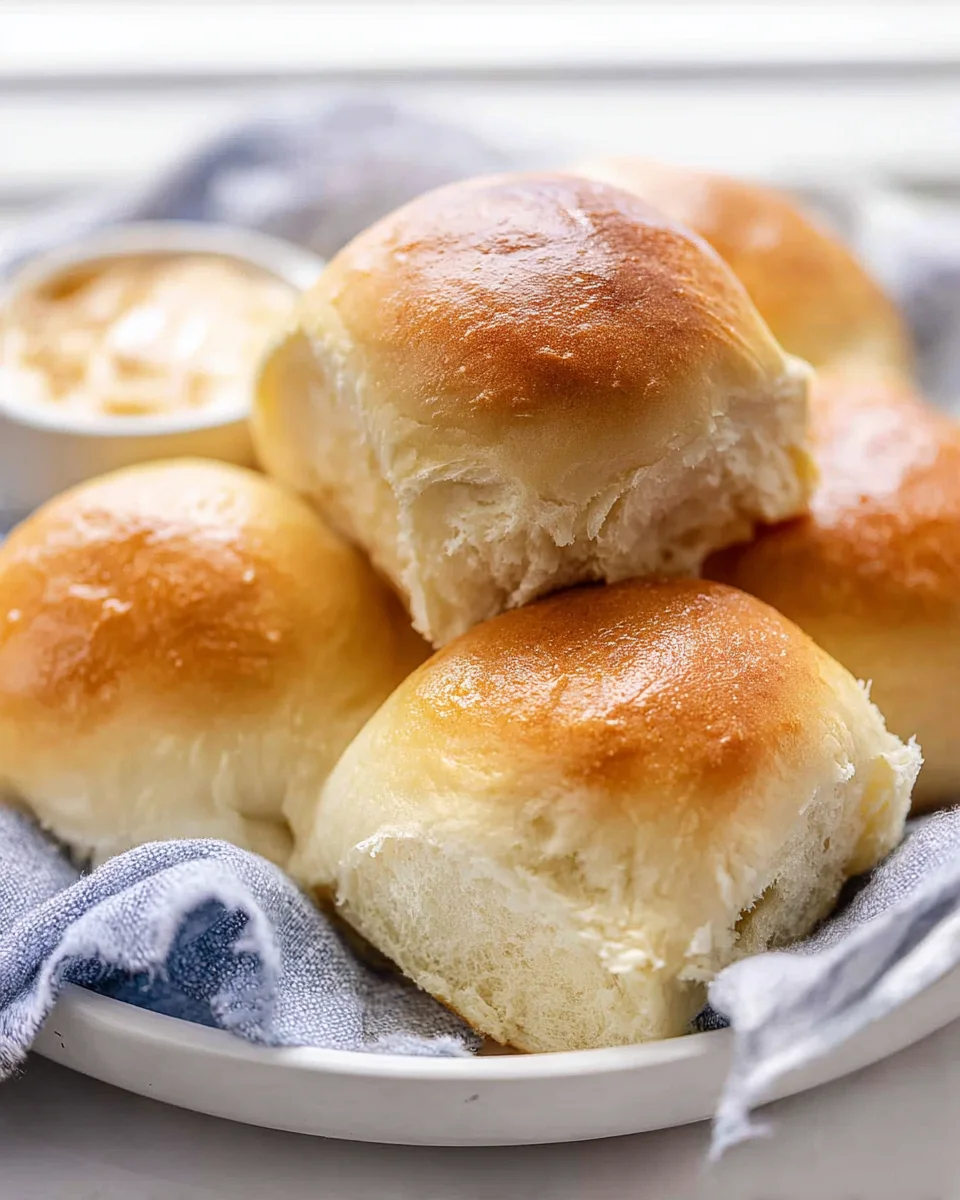
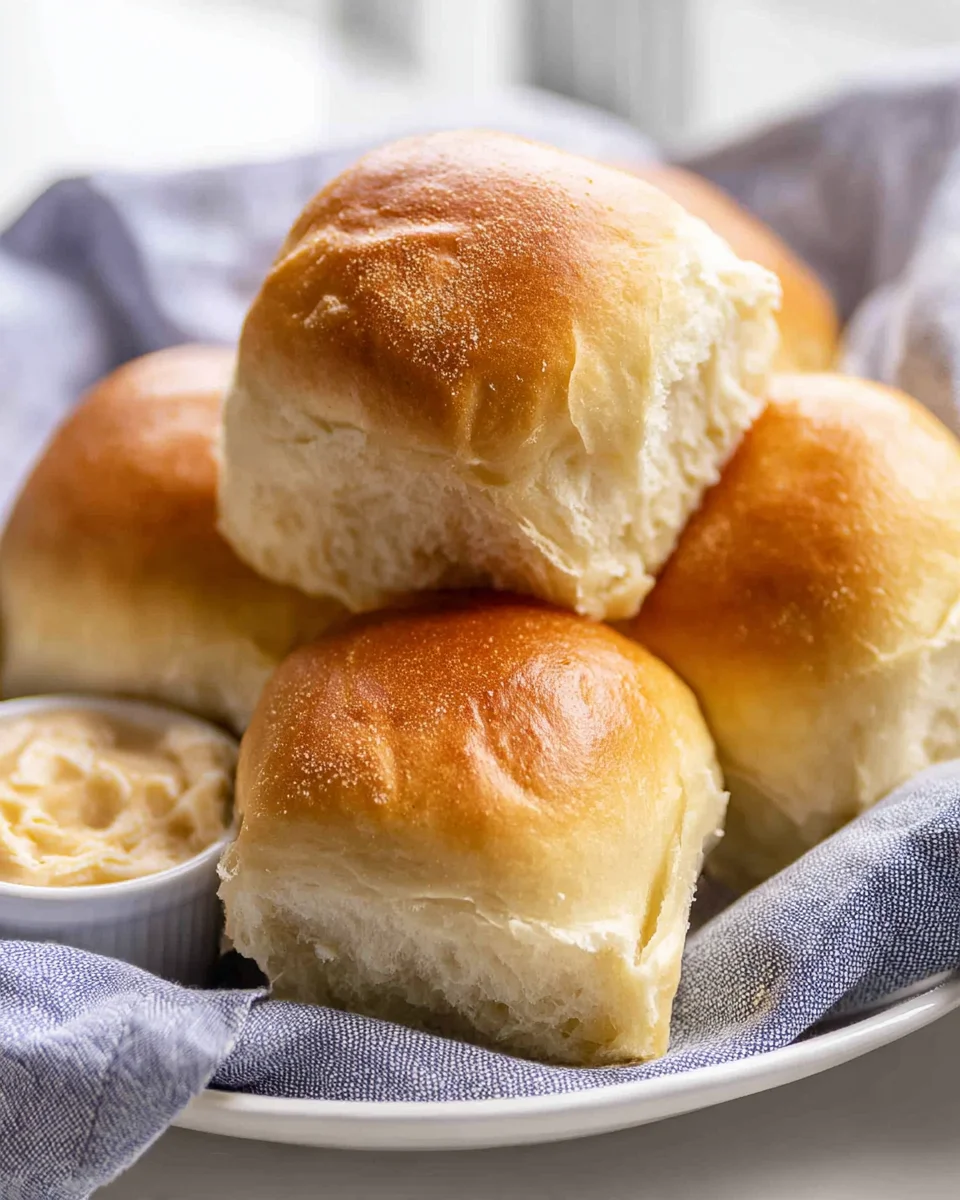
Texas Roadhouse Rolls – just hearing those words evokes a comforting warmth, doesn’t it? I remember the first time I bit into one of those heavenly, golden brown delights, fresh from the oven, slathered with their signature cinnamon honey butter. It was pure bliss. For millions across America, the experience of dining at Texas Roadhouse isn’t complete without their legendary rolls, and it’s easy to see why they’ve become such an iconic part of the restaurant’s charm. These aren’t just any dinner rolls; they are a cultural phenomenon, a symbol of hearty American dining that brings a smile to every face.
What makes them so universally adored? Is it their incredible softness, a texture so light and fluffy it practically melts in your mouth? Or perhaps the delicate balance of sweetness that makes them irresistible, whether you’re having them as an appetizer or alongside a hearty meal. I believe it’s all of the above, combined with the feeling of indulgence and comfort they provide. There’s nothing quite like fresh, warm Texas Roadhouse Rolls to elevate any meal into a special occasion. Getting that perfect consistency and flavor at home might seem daunting, but I promise you, it’s absolutely achievable. Prepare to amaze your family and friends with this beloved bakery treat, made right in your own kitchen.
Ingredients:
- For the Rolls:
- 1 cup warm water (aim for 105-115°F or 40-46°C – this is crucial for yeast activation)
- ½ cup milk (whole milk is preferred for richness, warmed slightly to lukewarm)
- ½ cup granulated sugar, divided (¼ cup for yeast, ¼ cup for dough)
- 2 ¼ teaspoons active dry yeast (one standard packet)
- 1 large egg, ideally at room temperature
- 1 teaspoon salt (fine sea salt or table salt works well)
- 6 tablespoons unsalted butter, melted and cooled slightly, plus more for greasing the baking dish and brushing finished rolls
- 4 ½ to 5 cups all-purpose flour, plus extra for dusting your work surface
- For the Honey Cinnamon Butter:
- ½ cup (1 stick) unsalted butter, softened completely to room temperature
- ½ cup powdered sugar (also known as confectioners’ sugar)
- 2 tablespoons honey (liquid honey is easiest to incorporate)
- ½ teaspoon ground cinnamon (freshly ground, if possible, for best flavor)
- Pinch of salt (optional, but a tiny bit helps balance the sweetness)
Preparing the Dough
- Activate the Yeast: To begin our journey to perfect Texas Roadhouse Rolls, grab a large mixing bowl or the bowl of your stand mixer. Pour in the precisely measured warm water and the slightly warmed milk. It’s important that the water temperature falls within the specified range of 105-115°F; too cold and the yeast won’t activate, too hot and it will kill the yeast. Add ¼ cup of the granulated sugar to this liquid base. Now, gently and evenly sprinkle the active dry yeast over the entire surface of the liquid. Resist the urge to stir it! Let this mixture sit undisturbed for a full 5 to 10 minutes. During this crucial time, you should observe the yeast dissolving, absorbing the liquid, and then beginning to bloom. A visible, foamy, frothy layer will appear on the surface – this is your green light, indicating that your yeast is alive, active, and eager to make your rolls rise beautifully. If you don’t see this frothy layer after 10 minutes, your yeast might be expired, or your liquid temperature was off, and you’ll need to start again with fresh yeast and careful temperature control.
- Combine Wet Ingredients: Once your yeast is demonstrably active and happy, proceed by adding the remaining ¼ cup of granulated sugar to the bowl. Next, crack in the large egg, ensuring it’s at room temperature if possible, as this helps it incorporate more smoothly and contributes to a better dough texture. Sprinkle in the 1 teaspoon of salt. With a whisk or a sturdy spoon, thoroughly combine these ingredients with the yeast mixture until they are well integrated. Now, pour in the 6 tablespoons of melted butter that has had a moment to cool down. It’s vital that the butter is not hot when it enters the bowl, as excessive heat can, again, harm your active yeast. Stir everything until you have a smooth, homogeneous liquid mixture, ready for the flour.
- Gradually Incorporate the Flour: Now for the dry ingredients. Start by adding the all-purpose flour, one cup at a time, to the wet mixture. If you’re using a stand mixer, attach the dough hook and begin mixing on a low speed. If you’re mixing by hand, use a strong wooden spoon or spatula. After each cup of flour, mix until it is mostly incorporated before adding the next. The dough will initially appear quite shaggy, wet, and sticky. As you continue to add flour, the dough will progressively come together, eventually pulling away from the sides of the bowl. Pay close attention to the dough’s consistency as you near the 4 ½ cup mark. You’re aiming for a dough that is soft, pliable, and just slightly tacky to the touch – it shouldn’t be excessively sticky, nor should it be dry and stiff. Depending on factors like the humidity in your kitchen or the brand of flour, you might not need all 5 cups, or you might need a tiny bit more than 4 ½. Trust your instincts and the feel of the dough.
- Knead the Dough to Perfection: Once the dough has formed a cohesive ball, it’s time for the critical kneading phase. If you’re fortunate enough to have a stand mixer, increase the speed to medium-low and let the dough hook do its work for 7 to 10 minutes. During this time, observe the dough: it should transform from a somewhat rough mass into a smooth, elastic, and springy ball that clings less to the sides of the bowl. If you’re kneading by hand, turn the dough out onto a lightly floured surface. Knead vigorously for a good 10 to 15 minutes. The classic hand-kneading technique involves pushing the dough away from you with the heel of your hand, folding it back over, rotating the dough a quarter turn, and repeating. You’ll feel the dough become more supple, less sticky, and gain a beautiful elasticity. A wonderful test for proper kneading is the “windowpane test”: pinch off a small piece of dough and very gently stretch it. If you can stretch it thin enough to see light pass through it without tearing, your dough is adequately kneaded. This elasticity is what gives our Texas Roadhouse Rolls their signature light and airy texture.
- First Rise (Bulk Fermentation): Take a large, clean bowl and lightly grease it with a small amount of oil or a dab of melted butter. Place your perfectly kneaded dough ball into this bowl, turning it once to ensure the entire surface is coated with a thin layer of grease. This simple step prevents the dough from drying out and sticking to the bowl during its rise. Cover the bowl tightly with plastic wrap or a clean, damp kitchen towel. Now, find a warm, draft-free spot in your kitchen for the dough to rise. A popular trick is to briefly warm your oven (turn it on for just a minute or two, then immediately turn it off) and place the covered bowl inside. Alternatively, a sunny spot on your counter or on top of your refrigerator can also work. Allow the dough to rise for approximately 1 to 1 ½ hours, or until it has visibly doubled in size. The exact timing will depend on the ambient temperature. You can test if it’s ready by gently poking it with a floured finger; if the indentation remains, your dough is beautifully risen and ready for the next step. This first rise is incredibly important for developing the deep, rich flavor and characteristic texture of your homemade Texas Roadhouse Rolls.
Shaping the Rolls
- Prepare Your Work Surface and Baking Dish: Once the dough has completed its glorious first rise, gently punch it down to release the accumulated air. This step helps redistribute the yeast and creates a finer crumb in the finished rolls. Turn the dough out onto a lightly floured surface. Before you begin shaping, take a moment to prepare your baking vessel. Generously grease a 9×13-inch baking pan (or two smaller 8×8-inch pans if you prefer thicker, pull-apart rolls) with butter. Don’t be shy with the butter; a well-greased pan not only prevents sticking but also contributes to a lovely golden-brown crust.
- Divide the Dough Evenly: For perfectly uniform Texas Roadhouse Rolls, consistent sizing is key. If you have a kitchen scale, this is an excellent time to use it. Divide the dough into approximately 24 equal pieces, aiming for about 45-50 grams per piece. If you don’t have a scale, you can visually divide the dough: first in half, then each half in half again, and continue this process until you have roughly 24 equal portions. This careful division ensures that all your rolls bake evenly and look professional.
- Shape the Individual Rolls: Take one divided piece of dough. With your palm, gently flatten it slightly on your lightly floured surface. Now, bring the edges of the dough inward, towards the center, pinching them together tightly at the bottom to form a neat seam. Flip the dough ball over so the pinched seam is facing down. Cup your hand over the dough ball and, using a gentle but firm circular motion, roll it around on your work surface. This technique creates tension on the surface of the dough, resulting in a smooth, taut, perfectly round roll with a lovely dome. Repeat this precise shaping process for all 24 pieces of dough.
- Arrange in the Baking Dish: As you finish shaping each roll, arrange them snugly in your prepared 9×13-inch baking pan. Typically, you’ll place them in rows, such as 4 rolls across by 6 rolls down. The rolls should be positioned close enough to lightly touch each other. This proximity is intentional; it encourages the rolls to rise upwards rather than spreading outwards, resulting in incredibly soft sides and that classic pull-apart characteristic, much like the authentic Texas Roadhouse Rolls we all adore.
Second Rise and Baking
- Second Rise (Proofing): Once all your beautifully shaped rolls are nestled in the baking dish, cover the pan loosely with plastic wrap or a clean kitchen towel. Return the covered pan to that warm, draft-free spot you used for the first rise. This second rise, often called proofing, will take approximately 30 to 45 minutes, or until the rolls have visibly puffed up, look noticeably larger, and are now firmly touching each other. They won’t double in size quite as dramatically as during the first rise, but they should appear very soft and airy. While your rolls are happily proofing, preheat your oven to 375°F (190°C). Make sure your oven rack is positioned in the middle for even baking.
- Bake to Golden Perfection: When your rolls have completed their second rise and the oven is fully preheated, carefully remove the cover from the baking dish. Place the pan directly into the preheated oven. Bake for 12 to 18 minutes. The precise baking time can vary significantly depending on your specific oven, so it’s important to keep an eye on them. You’re looking for the rolls to achieve a gorgeous, golden-brown color on their tops and around their edges. When gently tapped on the bottom, they should sound hollow, indicating they are cooked through. Be mindful not to overbake, as this can lead to dry rolls. If you notice the tops browning too quickly before the rolls are fully baked, you can loosely tent the pan with aluminum foil for the last few minutes to prevent over-browning.
Making the Honey Cinnamon Butter
- Prepare the Sweet Butter: While your rolls are baking, or even just as they are coming out of the oven, it’s the perfect time to whip up that irresistible honey cinnamon butter. In a medium-sized mixing bowl, combine the softened ½ cup (1 stick) unsalted butter. Ensure the butter is truly at room temperature – soft enough to easily indent with a finger, but not melted. Add the ½ cup powdered sugar, 2 tablespoons honey, ½ teaspoon ground cinnamon, and the optional pinch of salt. The salt helps to cut through the sweetness slightly and enhances the overall flavor profile.
- Whip Until Fluffy: Using an electric mixer (either a handheld mixer or a stand mixer fitted with the paddle attachment), beat all the ingredients together on medium speed. Start on a low speed to prevent the powdered sugar from flying everywhere, then increase to medium. Continue to beat until the mixture is beautifully light, fluffy, and all the ingredients are thoroughly combined. Make sure to scrape down the sides of the bowl occasionally with a spatula to ensure everything gets incorporated evenly. The finished butter should be pale in color with a wonderfully airy, cloud-like consistency. This fluffy texture is absolutely essential for it to spread effortlessly and melt perfectly over your warm Texas Roadhouse Rolls.
Finishing Touches
- Brush with Melted Butter: This step is critical for authentic Texas Roadhouse Rolls! As soon as your glorious rolls emerge from the oven, while they are still piping hot and in the pan, immediately brush their tops generously with a little extra melted butter (about 1-2 tablespoons). This optional but highly recommended step not only adds another layer of rich buttery flavor but also gives the rolls a beautiful, glistening sheen and helps to keep their crust wonderfully soft.
- Serve Warm with Honey Cinnamon Butter: Allow the baked rolls to cool in the pan for just 5-10 minutes. This brief resting period allows them to set slightly, making them easier to handle and preventing them from tearing when you try to pull them apart. Then, carefully transfer the warm rolls to a serving platter. Serve your absolutely irresistible, homemade Texas Roadhouse Rolls warm, accompanied by generous dollops of the freshly whipped, sweet honey cinnamon butter. The combination of the pillowy-soft, warm roll and the sweet, spiced, airy butter is truly a match made in culinary heaven. While these rolls are undeniably best enjoyed fresh from the oven, any leftovers can be stored in an airtight container at room temperature for a day or two and gently reheated for continued enjoyment.
Conclusion:
Well, friends, we’ve reached the sweet, doughy end of our baking journey, and I genuinely hope you’re feeling as excited as I am about the prospect of these incredible rolls gracing your table. If you’ve ever yearned for that particular kind of comfort food, that perfect accompaniment to any meal, or simply a show-stopping homemade treat that will have everyone asking for the recipe, then this is truly it. I’m talking about the kind of warm, fluffy, slightly sweet rolls that just melt in your mouth, leaving a buttery richness that makes you reach for another, and another.
Why This Recipe is an Absolute Must-Try
What makes these particular rolls so utterly irresistible? It’s more than just a recipe; it’s an experience. These aren’t just any dinner rolls; they are crafted to capture the essence of those famous, beloved Texas Roadhouse Rolls we all adore. That signature light-as-air texture, the subtle sweetness that perfectly balances the savory, and the golden-brown crust that yields to an unbelievably soft interior—it’s all here. Imagine pulling apart a warm roll, steam gently rising, and slathering it with a generous dollop of homemade cinnamon butter. That’s not just a meal; it’s a moment of pure culinary bliss.
I believe every home baker, regardless of skill level, deserves to experience the pride and joy of pulling a tray of these golden beauties from their oven. They’re forgiving, they’re fun to make, and the aroma alone will transform your kitchen into the coziest place on earth. It’s a recipe that delivers on its promise of deliciousness every single time, making it an essential addition to your baking repertoire for family dinners, holiday feasts, or just because you deserve a treat. The satisfaction of recreating such an iconic taste right in your own home is immeasurable, and the compliments you’ll receive will be the sweetest reward.
Serving Suggestions to Elevate Your Experience
While these rolls are undeniably spectacular on their own, especially when fresh from the oven, pairing them with the right accompaniments or meals can truly elevate your dining experience. The classic choice, of course, is a generous smear of butter, perhaps even a homemade cinnamon-honey butter for that extra touch of sweetness that echoes the rolls’ own profile. But don’t stop there!
- The Ultimate Sidekick: Serve them alongside a hearty bowl of chili, a robust beef stew, or a creamy chicken pot pie. Their ability to soak up delicious sauces and gravies is unmatched, making them the perfect edible spoon.
- BBQ Bliss: Planning a barbecue? These rolls are the perfect complement to pulled pork, smoked brisket, or grilled chicken. They provide a soft, slightly sweet contrast to the smoky flavors and rich textures of BBQ, and are excellent for making impromptu sandwiches.
- Steakhouse Staple: Recreate a full steakhouse experience at home by serving them hot with your perfectly cooked steak and baked potato. They truly complete the meal, making it feel extra special.
- Breakfast/Brunch Delight: Believe it or not, they make fantastic, albeit unconventional, breakfast items! Split them, toast them lightly, and spread with jam, marmalade, or cream cheese for a decadent morning treat. They also pair wonderfully with scrambled eggs.
- Mini Sandwiches: For gatherings, slice them horizontally and fill with deli meats, cheese, or even mini burger patties for adorable and delicious sliders that everyone will adore. They’re also fabulous with chicken salad.
- Holiday Hero: On Thanksgiving or Christmas, these rolls will undoubtedly steal the show as everyone’s favorite bread item, perfect for sopping up gravy or enjoying with leftover turkey and cranberry sauce. They bring a touch of home-baked luxury to any festive spread.
Creative Variations to Make Them Your Own
The beauty of a foundational recipe like this is its versatility. Once you’ve mastered the basic technique, feel free to experiment and put your own spin on these delightful rolls. Here are a few ideas to spark your creativity:
- Herb-Infused Rolls: Before baking, brush the tops with melted butter mixed with finely chopped fresh rosemary, thyme, or garlic powder for an aromatic, savory twist. This is particularly lovely when serving with Italian or Mediterranean dishes, or alongside a simple roast chicken.
- Cheesy Goodness: Incorporate about a cup of shredded cheddar, Parmesan, or a blend of your favorite cheeses into the dough during the kneading process, or sprinkle some on top before baking for a savory, cheesy crust. Gruyere or provolone would also be delicious choices.
- Sweet Glaze: For an even sweeter treat, whip up a simple powdered sugar glaze (powdered sugar, a splash of milk, and a hint of vanilla extract) and drizzle it over the warm rolls straight out of the oven. This turns them into an irresistible dessert roll.
- Garlic Butter Bombs: After baking, instead of plain butter, brush generously with a homemade garlic butter (melted butter, minced garlic, and a pinch of parsley). This adds an incredible burst of flavor that will have taste buds singing.
- Seed Topping: Sprinkle poppy seeds, sesame seeds, or everything bagel seasoning on top of the egg wash before baking for added texture and a unique flavor profile. This works especially well for rolls intended for sandwiches.
- Shape Shifters: While classic squares are easy, don’t hesitate to shape them into traditional round dinner rolls, elegant knots, or even small braided rolls for a more sophisticated presentation. The dough is wonderfully pliable.
- Whole Wheat Blend: For a slightly healthier touch or a nuttier flavor, you could substitute up to 1 cup of the all-purpose flour with whole wheat flour. Just be mindful that this might make the rolls a little denser, so adjust liquid as needed to maintain dough consistency.
Your Turn! Bake, Enjoy, and Share!
Now that you have all the tips, tricks, and inspiration, it’s truly time for you to roll up your sleeves and bring these magnificent creations to life in your own kitchen. There’s a special kind of satisfaction that comes from baking bread from scratch, and these Texas Roadhouse Rolls are an incredibly rewarding project. Don’t be intimidated; the process is straightforward, and the results are consistently spectacular.
I absolutely encourage you to try this recipe. Imagine the smiles, the oohs and aahs, and the contented sighs around your dinner table. These rolls aren’t just food; they’re a centerpiece of comfort and joy, a testament to the warmth of homemade goodness that permeates your home and brings everyone together. It’s an act of love, baked into every fluffy bite.
Once you’ve experienced the magic, I would be absolutely thrilled to hear about it! Please, come back and share your baking journey with me. Did you try a fun variation? What did you serve them with? Did your family rave about them? Your experiences and feedback are so valuable, not just to me, but to other aspiring bakers in our community who are looking for inspiration and confirmation. Snap a picture, share your thoughts in the comments below, and let’s celebrate the deliciousness together. Happy baking!
Homemade Texas Roadhouse Rolls: Fluffy & Sweet Copycat
Texas Roadhouse Rolls – just hearing those words evokes a comforting warmth, doesn’t it? I remember the first time I bit into one of those heavenly, golden brown delights, fresh from the oven, slathered with their signature cinnamon honey butter. It was pure bliss. For millions across America, the experience of dining at Texas Roadhouse isn’t complete without their legendary rolls, and it’s easy to see why they’ve become such an iconic part of the restaurant’s charm. These aren’t just any dinner rolls; they are a cultural phenomenon, a symbol of hearty American dining that brings a smile to every face. What makes them so universally adored? Is it their incredible softness, a texture so light and fluffy it practically melts in your mouth? Or perhaps the delicate balance of sweetness that makes them irresistible, whether you’re having them as an appetizer or alongside a hearty meal. I believe it’s all of the above, combined with the feeling of indulgence and comfort they provide. There’s nothing quite like fresh, warm Texas Roadhouse Rolls to elevate any meal into a special occasion. Getting that perfect consistency and flavor at home might seem daunting, but I promise you, it’s absolutely achievable. Prepare to amaze your family and friends with this beloved bakery treat, made right in your own kitchen.
Ingredients
Instructions
Important Information
Nutrition Facts (Per Serving)
It is important to consider this information as approximate and not to use it as definitive health advice.
Allergy Information
Please check ingredients for potential allergens and consult a health professional if in doubt.


Leave a Comment