Whipped Shortbread Cookies are not just a treat; they are an experience, a delicate bite of buttery heaven that truly melts in your mouth the moment it touches your tongue. If you’ve ever dreamt of a cookie that perfectly balances richness with an impossibly light texture, then you’ve found your holy grail. I’m thrilled to share with you the magic behind these incredibly tender, airy delights that have graced countless holiday tables and cozy afternoon teas.
Originating from the traditional Scottish shortbread, our beloved whipped version takes that classic comfort to an entirely new level. The simple act of creaming butter and sugar until it’s light and fluffy, then folding in flour, transforms humble ingredients into something truly extraordinary. This meticulous whipping process is what gives these cookies their signature cloud-like consistency, making them distinctively different from their denser cousins. People adore them not only for their exquisite, pure buttery flavor that sings on the palate but also for that unbelievable melt-away texture that leaves you craving just one more. They are the epitome of simple elegance and a testament to how sometimes, the most basic ingredients can create the most profound joy.
From festive gift boxes to a quiet moment with a cup of coffee, these Whipped Shortbread Cookies hold a special place in the hearts of many. Their versatility, combined with their irresistible charm and delicate sweetness, makes them an absolute favorite. Get ready to discover the secrets to baking these delightful confections that promise to impress everyone who takes a bite.
Ingredients:
Creating truly exquisite Whipped Shortbread Cookies starts with having all your ingredients measured and ready. The quality and temperature of these components are absolutely critical for achieving that signature melt-in-your-mouth texture.
- 1 cup (226g) Unsalted Butter, softened: This is the cornerstone of our whipped shortbread! It absolutely needs to be at true room temperature, not just slightly soft. If it’s too cold, it won’t cream properly; if it’s melted, your cookies will spread too much. I usually take mine out about 1-2 hours before I plan to bake.
- ¾ cup (90g) Powdered Sugar (Confectioners’ Sugar): Using powdered sugar instead of granulated sugar is one of the secrets to the incredibly smooth and delicate texture of these Whipped Shortbread Cookies. It dissolves more easily and doesn’t leave any gritty texture.
- 1 ¾ cups (210g) All-Purpose Flour: Make sure to level your flour properly. Too much flour will result in dry, crumbly cookies, while too little could make them too delicate to handle. I always recommend spooning your flour into the measuring cup and then leveling it off with a straight edge for accuracy.
- ¼ cup (30g) Cornstarch: This seemingly small addition plays a huge role in the tender, melt-away texture of our Whipped Shortbread Cookies. Cornstarch inhibits gluten development, leading to a more delicate crumb that truly dissolves on your tongue. Don’t skip it!
- 1 teaspoon Pure Vanilla Extract: Use a good quality vanilla extract here; it really makes a difference in the overall flavor profile. It adds a lovely warmth and depth to the rich buttery taste.
- ½ teaspoon Fine Sea Salt: A pinch of salt is essential to balance the sweetness and enhance all the other flavors in the cookies. It prevents them from tasting flat.
- Optional Toppings/Garnishes:
- Red and green candied cherries or sprinkles: For a classic holiday look, these are perfect placed gently on top before baking.
- Melted chocolate for drizzling: A decadent finish after the cookies have cooled completely.
- Extra powdered sugar for dusting: A simple yet elegant touch.
Getting Ready: Prepping for Perfect Whipped Shortbread Cookies
Before we dive into the delightful process of making our Whipped Shortbread Cookies, a little preparation goes a long way to ensure a smooth and successful baking experience. This phase is crucial for setting yourself up for success, ensuring that once you start mixing, everything flows seamlessly.
- Preheat Your Oven to Perfection: First things first, let’s get that oven ready. Preheat your oven to a gentle 325°F (160°C). A lower temperature is key for shortbread cookies because it allows them to bake through evenly without browning too much, preserving their pale, delicate appearance and preventing them from becoming dry or tough. This slow and steady approach is essential for that signature melt-in-your-mouth texture we’re aiming for with these Whipped Shortbread Cookies.
- Prepare Your Baking Sheets: Line two large baking sheets with parchment paper. Parchment paper is your best friend here! It prevents sticking, makes cleanup a breeze, and helps with even baking by providing a non-stick surface. Resist the urge to use silicone mats for shortbread if you can, as parchment paper often gives a slightly crispier bottom crust, which is a lovely contrast to the delicate interior.
- Measure and Sift Dry Ingredients: In a medium bowl, combine your all-purpose flour, cornstarch, and fine sea salt. Now, here’s a step I highly recommend: sift these dry ingredients together. Sifting isn’t just for removing lumps; it also aerates the flour and cornstarch, ensuring they are evenly distributed and that your mixture is light and lump-free. This contributes significantly to the light and airy texture of the finished Whipped Shortbread Cookies. Set this mixture aside.
- Ensure Butter is Truly Room Temperature: I cannot stress enough how important this is for Whipped Shortbread Cookies. Your unsalted butter should be genuinely softened to room temperature. This means it should be pliable enough to leave an indentation when gently pressed but not oily or greasy. If your butter is too cold, it won’t cream properly with the sugar, leading to a denser cookie. If it’s too warm or melted, the cookies will spread excessively in the oven and lose their shape. Plan ahead and take your butter out of the fridge at least an hour or two before you start. This foundational step is the bedrock of achieving that characteristic “whipped” texture.
- Gather Your Tools: Make sure you have an electric mixer (either a stand mixer with a paddle attachment or a hand mixer), rubber spatulas, measuring cups and spoons, and any desired decorations (like sprinkles or candied cherries) ready to go. Having everything within reach will make the process much more enjoyable and efficient. This meticulous preparation ensures that when you finally begin mixing, your focus can be entirely on the technique, which is critical for these delicate shortbreads.
Crafting the Silky Dough for Your Whipped Shortbread Cookies
Now for the heart of the recipe: mixing the dough! This is where the “whipped” magic truly happens, transforming simple ingredients into a light, ethereal base for our delightful Whipped Shortbread Cookies. The key here is patience and attention to detail, especially in the creaming process.
- Cream the Butter and Powdered Sugar Extensively: In the bowl of your electric mixer, fitted with the paddle attachment (or using a hand mixer in a large bowl), add your softened unsalted butter and powdered sugar. Begin mixing on low speed until the sugar is just incorporated with the butter, preventing a cloud of powdered sugar from erupting in your kitchen. Once combined, increase the speed to medium-high. Now, this is where you need to be patient. Cream the butter and sugar together for a full 5 to 7 minutes, or even up to 10 minutes. This extensive creaming is the secret to truly whipped shortbread cookies. You are not just mixing; you are incorporating air into the butter and sugar mixture. During this process, the mixture will undergo a significant transformation: it will become noticeably lighter in color, turning from a pale yellow to almost white, and it will increase substantially in volume, becoming incredibly light and fluffy, almost like a buttercream frosting. Scrape down the sides of the bowl occasionally with a rubber spatula to ensure everything is evenly incorporated. This aeration is what gives these Whipped Shortbread Cookies their signature delicate, melt-in-your-mouth texture. If you rush this step, your cookies will be denser and not have that characteristic lightness.
- Incorporate the Vanilla Extract: Once your butter and sugar mixture is magnificently light and fluffy, add the pure vanilla extract. Mix on low speed for just about 30 seconds, or until the vanilla is fully incorporated. Scrape down the sides of the bowl one last time to ensure everything is homogenous and infused with that lovely vanilla aroma.
- Gradually Add the Sifted Dry Ingredients: Now it’s time to bring in our pre-sifted flour and cornstarch mixture. Reduce your mixer speed to the absolute lowest setting. Add the dry ingredients to the butter mixture in three additions, mixing only until just combined after each addition. The critical part here is not to overmix. Overmixing after the flour is added can develop the gluten in the flour, leading to tough cookies – and we want tender, delicate Whipped Shortbread Cookies! Mix just until no streaks of flour remain and the dough comes together. The dough will be very soft and somewhat crumbly initially, but as you continue to gently mix, it will form a soft, cohesive dough. It should be pliable but still soft enough to pipe or press.
- Perform a Final Dough Check: At this point, stop the mixer. Use your hands to gently gather any remaining crumbs at the bottom of the bowl and lightly press them into the main dough mass. The dough for Whipped Shortbread Cookies should be smooth, homogenous, and soft, almost like playdough, but slightly stickier due to the high butter content. It should not be crumbly, nor should it be too wet. If it feels too warm from the mixing process, you can refrigerate it for 10-15 minutes to firm it up slightly, which will make it easier to handle, especially if you plan to pipe them.
Shaping and Baking Your Delightful Whipped Shortbread Cookies
With our beautifully silky dough prepared, it’s time for the fun part: shaping these glorious Whipped Shortbread Cookies and sending them off to the oven to transform into golden, buttery delights. There are several ways to shape them, each offering a slightly different charm.
- Choose Your Shaping Method:
- Method A: Classic Piped Rosettes: For that truly elegant, classic look, spoon your soft shortbread dough into a pastry bag fitted with a large star tip (like a Wilton 1M or 2D). Pipe beautiful rosettes, swirls, or S-shapes onto your prepared baking sheets, leaving about 1 to 1.5 inches between each cookie to allow for a little spread. The softness of the dough from the extensive whipping makes it ideal for piping, resulting in intricate designs that bake beautifully and add to the allure of these Whipped Shortbread Cookies.
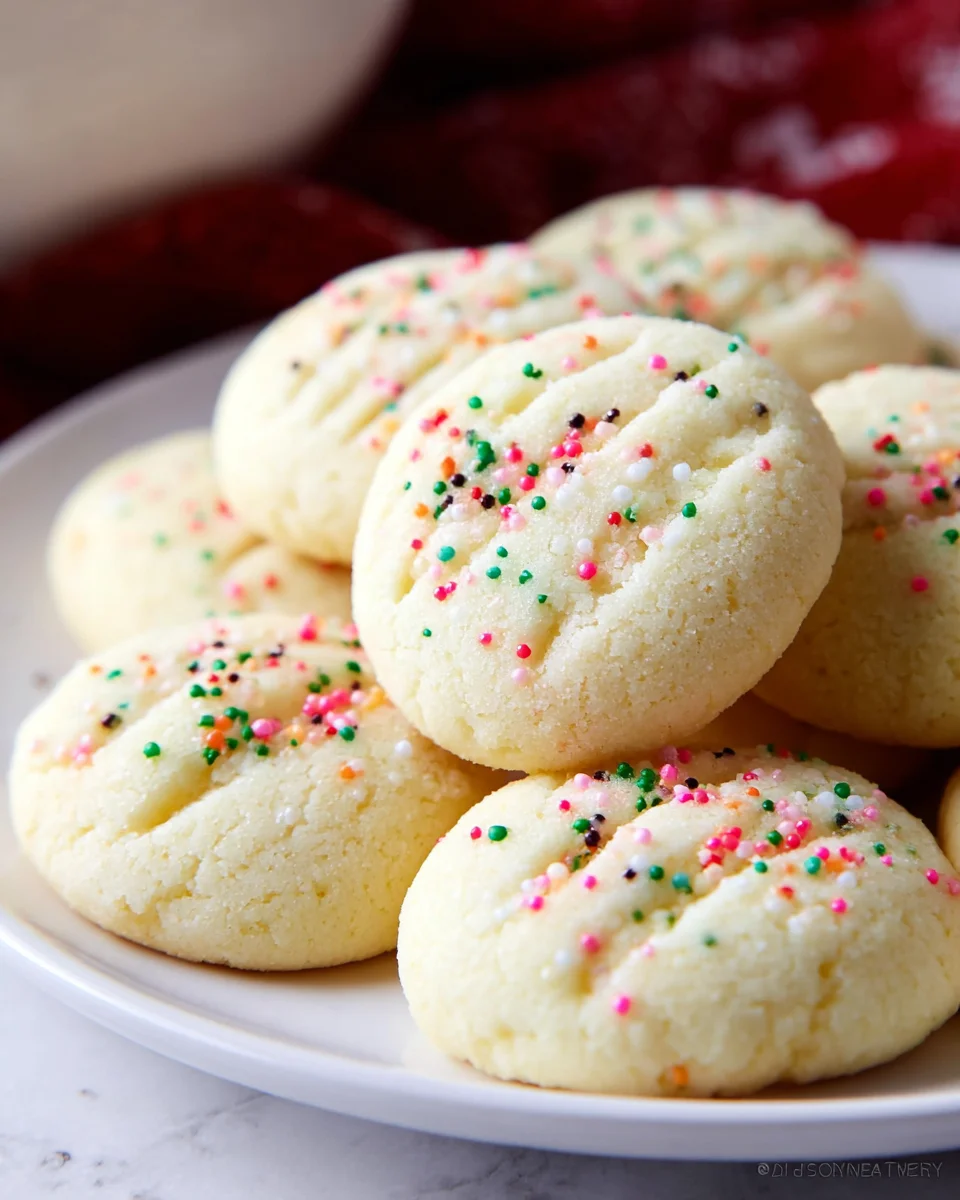
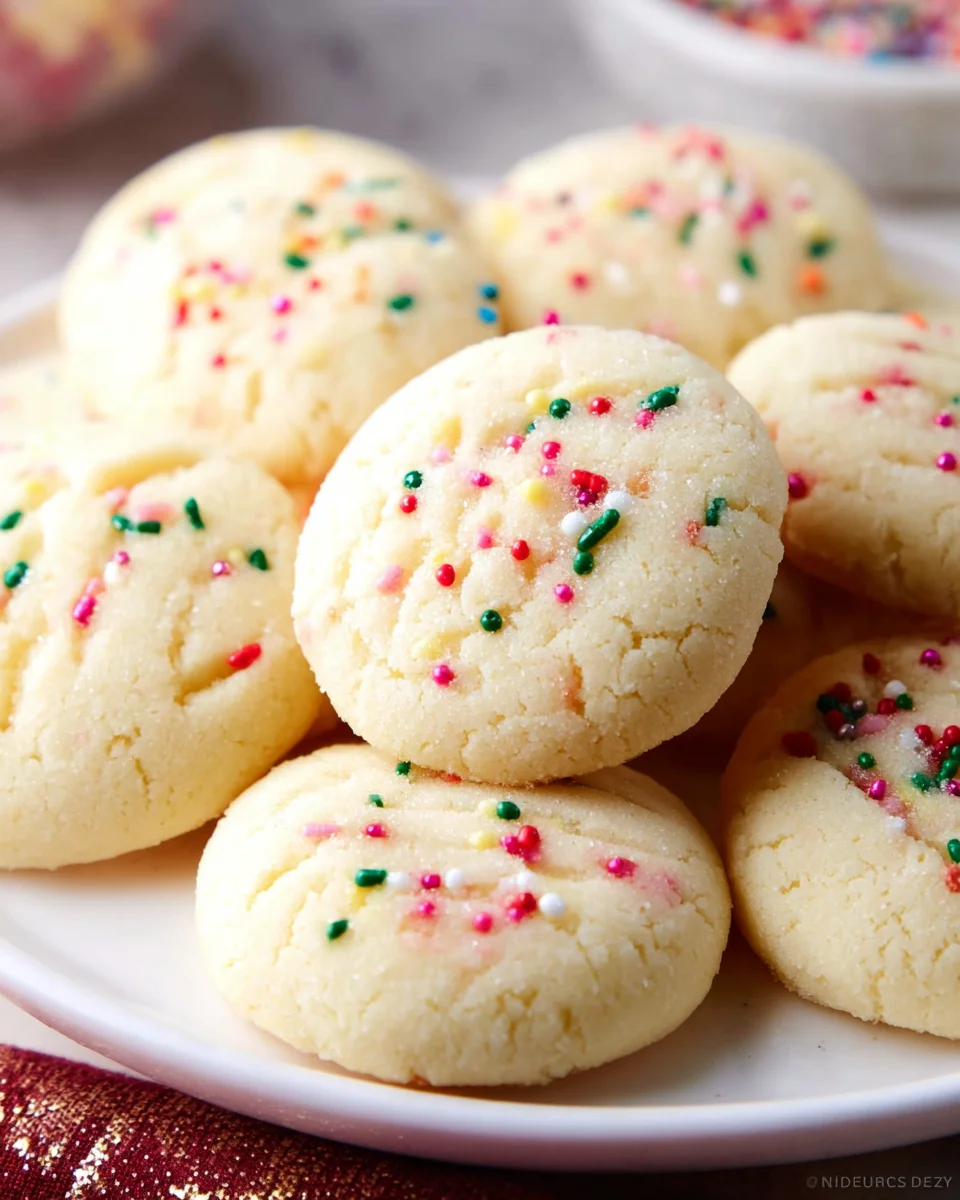
- Method B: Fork-Pressed Rounds: If you don’t have a pastry bag, or prefer a more rustic, homey look, you can roll the dough into small balls, about 1-inch in diameter. Place them on the prepared baking sheets and then gently flatten each ball with the tines of a fork, creating a classic crosshatch pattern. This is a traditional shortbread presentation that works wonderfully for our whipped version.
- Method C: Slice-and-Bake (Requires Chilling): For a simpler approach that yields consistently shaped cookies, you can gently form the dough into a log (about 1.5-2 inches in diameter), wrap it tightly in plastic wrap, and refrigerate for at least 30 minutes, or up to an hour, until firm. Once firm, slice the log into ¼-inch thick rounds and arrange them on your baking sheets. This method is fantastic if you want to prepare the dough ahead of time or if you find the piped method a bit daunting.
No matter which method you choose, remember that the delicate nature of Whipped Shortbread Cookies means gentle handling is key. Don’t overwork the dough at this stage, as it can affect the tenderness.
- Add Optional Decorations: If you’re using candied cherries, sprinkles, or any other oven-safe decorations, now is the time to gently press them onto the top of each unbaked cookie. A single half of a red or green candied cherry in the center of a piped rosette is particularly charming and festive.
- Bake Until Just Set and Pale Golden: Carefully transfer your baking sheets to the preheated 325°F (160°C) oven. Bake for approximately 15 to 20 minutes. The baking time can vary slightly depending on your oven and the size/thickness of your cookies, so keep a close eye on them. The goal for Whipped Shortbread Cookies is to bake them until they are set around the edges but still very pale, almost white, in the center. You might see just a hint of golden color around the very bottom edges. They should not be deeply golden brown. Overbaking will make them dry and crumbly rather than tender and melt-in-your-mouth. If you are baking multiple sheets, rotate them halfway through baking to ensure even cooking.
- Observe for Doneness: When you think they are done, gently touch the top of one cookie. It should feel firm to the touch, not wobbly or excessively soft. The aroma of rich butter will also fill your kitchen, a sure sign that deliciousness is on its way! Remember, they will continue to firm up slightly as they cool on the baking sheet.
Cooling and Finishing Touches for Your Whipped Shortbread Cookies
The journey of our exquisite Whipped Shortbread Cookies isn’t quite complete once they emerge from the oven. Proper cooling and thoughtful finishing touches are essential to ensure they reach their peak texture and flavor, ready to be enjoyed.
- Initial Cooling on the Baking Sheet: Once your Whipped Shortbread Cookies are baked to perfection, resisting the urge to immediately move them is crucial. They are quite delicate when hot, and attempting to transfer them too soon might lead to breakage. Leave the cookies on the baking sheets for about 5 to 10 minutes. During this brief cooling period, they will firm up sufficiently, making them much easier to handle without crumbling. This step is a small but important investment in preserving the structural integrity of these tender treats.
- Transfer to a Wire Rack for Complete Cooling: After their initial rest on the baking sheet, carefully transfer the cookies to a wire cooling rack using a thin metal spatula. Arrange them in a single layer, ensuring there’s enough space for air to circulate around each cookie. Allow them to cool completely at room temperature. This complete cooling process is vital for the texture of our Whipped Shortbread Cookies. It allows them to set fully and develop their characteristic crumbly, yet firm, structure. Rushing this step or attempting to decorate them while warm could result in a messy or melted finish.
- Optional Finishing Touches and Decorations: Once the Whipped Shortbread Cookies are entirely cool, you can add any final decorative flourishes.
- Chocolate Drizzle: For a decadent twist, melt some good quality chocolate (dark, milk, or white chocolate works beautifully) in a microwave-safe bowl in 30-second intervals, stirring until smooth, or use a double boiler. Drizzle the melted chocolate artistically over the cooled cookies using a spoon or a pastry bag with a very small tip. Allow the chocolate to set completely at room temperature or in the refrigerator for a few minutes before serving.
- Powdered Sugar Dusting: For a simple yet elegant presentation, lightly dust the cooled cookies with a sprinkle of extra powdered sugar using a fine-mesh sieve. This adds a touch of sweetness and a beautiful, ethereal appearance.
- Glaze: A simple vanilla glaze (powdered sugar mixed with a touch of milk or cream and vanilla extract) can also be drizzled over the cookies for added sweetness and shine. Ensure the glaze has fully set before stacking or storing.
These finishing touches enhance the visual appeal and can add an extra layer of flavor to your already delicious Whipped Shortbread Cookies.
- Storing Your Whipped Shortbread Cookies: Once completely cooled and any decorations have set, store your Whipped Shortbread Cookies in an airtight container at room temperature. They will maintain their freshness and delightful texture for up to 1 week. If you’re in a humid environment, a parchment paper barrier between layers can prevent sticking. These cookies also freeze exceptionally well for up to 2-3 months. Simply place them in a freezer-safe airtight container, perhaps with parchment paper between layers, and thaw at room temperature before serving. In fact, many people find that the flavor of shortbread often deepens and improves after a day or two, allowing the buttery notes to fully develop. Enjoy your wonderfully tender and rich Whipped Shortbread Cookies! They are perfect with a cup of tea, coffee, or as a delightful treat any time of day.
Conclusion:
There are countless cookies in the world, but I genuinely believe that this recipe for delectable shortbread stands out from the crowd. It’s not just another sweet treat; it’s an experience, a moment of pure, unadulterated buttery bliss that truly melts in your mouth from the very first bite. I’ve shared this recipe with so many friends and family members over the years, and the reaction is always the same: a wide-eyed look of surprise, followed by a contented sigh as they savor the delicate texture and rich flavor. What makes these cookies so exceptional is the unique whipping process for the butter and sugar, which infuses them with an airy lightness while still maintaining that classic shortbread crumb. They strike a perfect balance between being wonderfully rich and incredibly delicate, creating a confection that feels both luxurious and comforting. You might think such a sophisticated cookie would be complicated to make, but I promise you, the process is surprisingly straightforward, yielding impressive results with minimal fuss. The simple elegance of these cookies makes them a fantastic choice for any occasion, whether you’re looking for an easy weeknight indulgence or a show-stopping addition to your holiday dessert table. Their beautiful simplicity means the natural, high-quality ingredients truly shine through, making every bite a testament to classic baking at its finest.
When it comes to serving these delightful cookies, the possibilities are as endless as your imagination. My absolute favorite way to enjoy them is alongside a steaming mug of tea or a robust cup of coffee; the slight bitterness of the beverage perfectly complements the sweet, buttery notes of the cookie. They also make an exquisite addition to any dessert platter, instantly elevating a collection of sweets with their refined appearance and superior taste. For a more elaborate presentation, try serving them alongside a scoop of vanilla bean ice cream, allowing the cookie’s crumbly texture to contrast beautifully with the creamy coolness. A sprinkle of fresh berries, like raspberries or blueberries, can add a lovely touch of color and a hint of tartness, cutting through the richness just enough to make them even more enticing. During the holiday season, I love to arrange them artfully in decorative tins or cellophane bags, tying them with a festive ribbon. They make for truly thoughtful and much-appreciated homemade gifts that always disappear quickly. Imagine them as part of a charming afternoon tea spread, perhaps with tiny finger sandwiches and a pot of Earl Grey; they truly transform any gathering into something special. Their sturdy yet delicate nature also means they travel well, making them perfect for sharing at potlucks or as a sweet surprise for a friend.
One of the aspects I love most about this recipe is its incredible versatility, allowing you to easily customize it to your personal preferences or the occasion. While they are utterly perfect in their classic form, don’t hesitate to experiment with flavor variations. For a citrusy twist, try adding a teaspoon of finely grated lemon or orange zest to the butter and sugar mixture; it brightens the flavor profile beautifully. A hint of almond extract, instead of vanilla, can lend a sophisticated, nutty undertone, making them feel wonderfully gourmet. If you’re a chocolate lover, gently fold in a handful of mini chocolate chips or finely chopped dark chocolate after the dry ingredients have been incorporated – the melty pockets of chocolate are divine! For an extra layer of texture, you could even sprinkle the tops with a pinch of sea salt before baking to create a lovely sweet-and-savory contrast, or a few colorful sprinkles for a festive look. After they’ve cooled, a simple drizzle of melted dark or white chocolate can add an elegant touch, or you could dust them lightly with powdered sugar for a classic finish. You can also play with shapes; while I often opt for simple rounds, using cookie cutters to create stars, hearts, or festive shapes for holidays adds a charming personalized touch. The dough holds its shape remarkably well, making it ideal for intricate designs.
So, there you have it! I truly hope you’re feeling inspired to roll up your sleeves and give this incredible recipe a try. I promise you, the joy of baking these cookies, and more importantly, the sheer delight of tasting them, is an experience you won’t want to miss. They embody everything wonderful about homemade treats: simplicity, incredible flavor, and the ability to bring smiles to everyone’s faces. Don’t be shy; embrace the process, have fun with the variations I’ve suggested, or even invent your own! I absolutely adore hearing about your kitchen adventures, so please don’t hesitate to share your experiences with these fantastic Whipped Shortbread Cookies. Did you add a unique flavor? What serving suggestion did you find most appealing? How did your friends and family react? Your feedback and photos mean the world to me, and seeing your creations truly makes my day. Go on, gather your ingredients, preheat your oven, and prepare to fall in love with what I believe might just become your new favorite cookie recipe. Happy baking!
Easy Melt-in-Your-Mouth Whipped Shortbread Cookies
Delicate, buttery whipped shortbread cookies with an impossibly light, melt-in-your-mouth texture. A classic comfort perfected through a meticulous whipping process that creates an airy, tender delight perfect for any occasion.
Ingredients
Instructions
Important Information
Nutrition Facts (Per Serving)
It is important to consider this information as approximate and not to use it as definitive health advice.
Allergy Information
Please check ingredients for potential allergens and consult a health professional if in doubt.


Leave a Comment