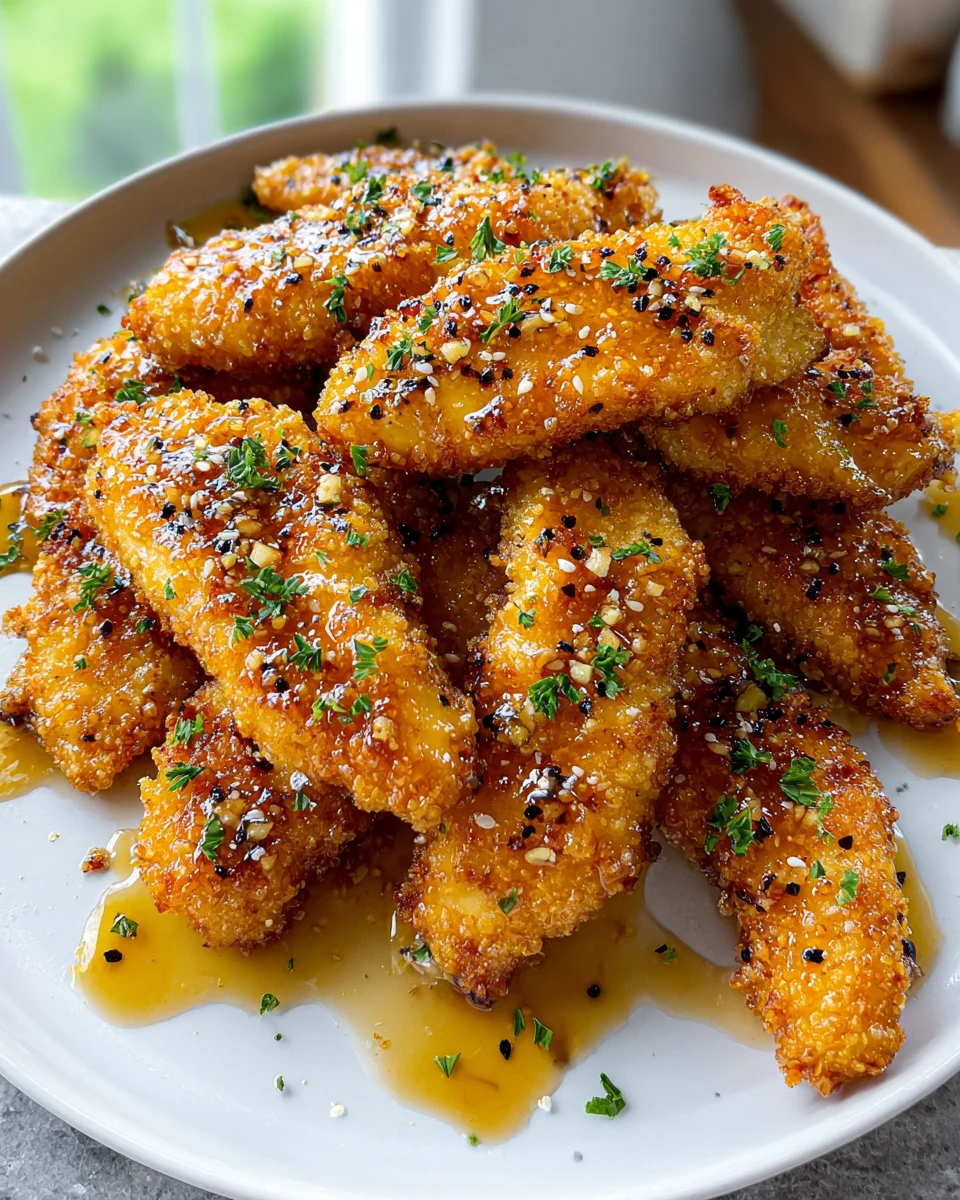
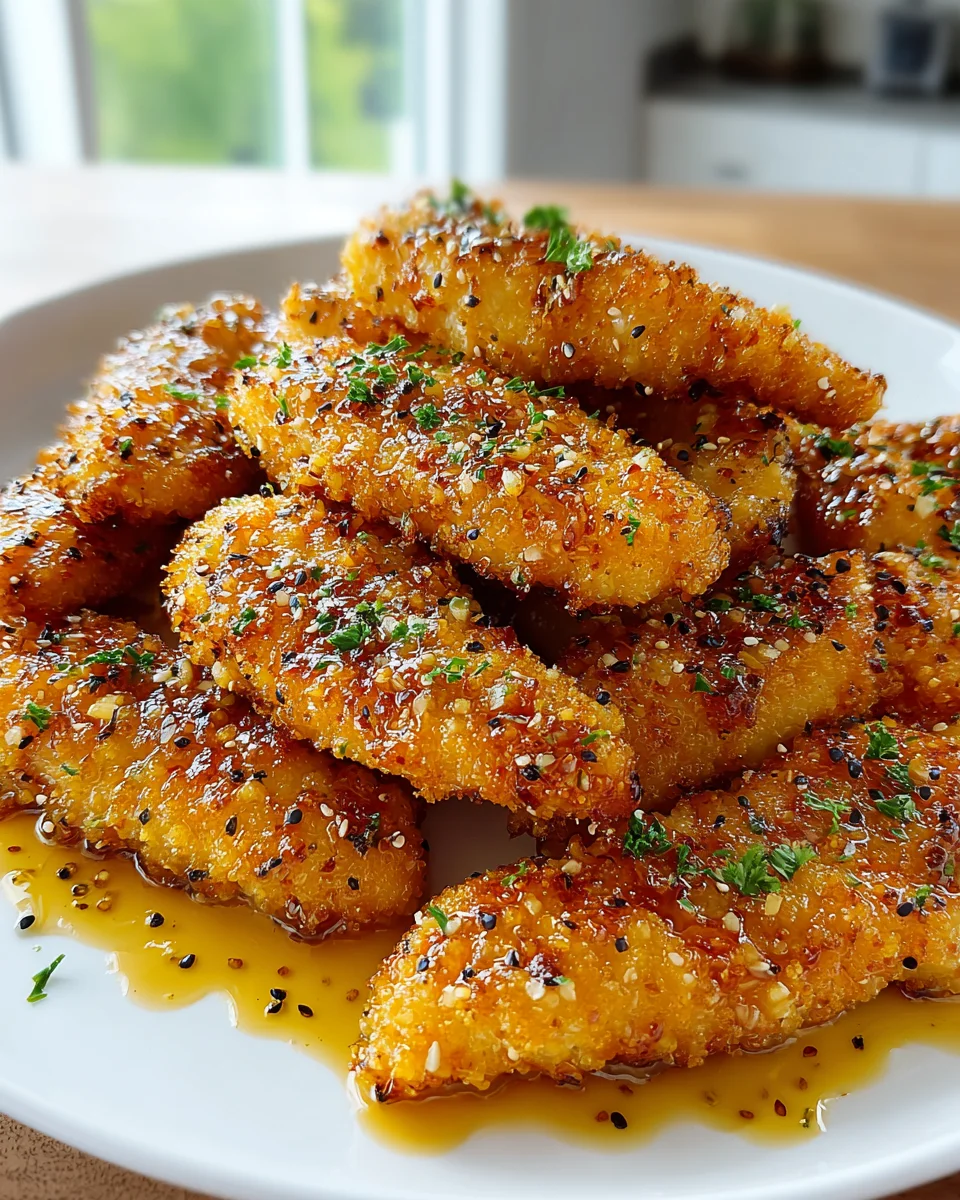
Air Fryer Honey Butter Garlic Chicken Tenders are about to become your new weeknight obsession, and I’m thrilled to share why this recipe has earned a permanent spot in my culinary rotation. Imagine sinking your teeth into incredibly tender chicken, encased in a golden, crispy coating, all drenched in a harmonious glaze that’s sweet, savory, and exquisitely garlicky. It’s a symphony of flavors and textures that truly elevates the humble chicken tender into something spectacular.
While chicken tenders themselves have become a beloved staple of modern comfort food, evolving from the classic fried chicken to offer a more convenient and family-friendly option, the magic truly happens when we introduce the efficiency of the air fryer and this irresistible flavor combination. The beauty of this dish lies not just in its undeniable deliciousness but also in its incredible ease of preparation. Gone are the days of messy deep-frying; the air fryer delivers that coveted crispness with minimal oil, making it a healthier alternative without sacrificing an ounce of flavor.
People adore these Air Fryer Honey Butter Garlic Chicken Tenders for their perfect balance: the rich butter and aromatic garlic create a deeply savory base, beautifully complemented by a touch of golden honey. This ensures every bite is juicy, intensely flavorful, and incredibly satisfying. Whether you’re preparing a quick dinner for the family, a game-day snack, or simply craving something utterly delicious and easy to make, this recipe delivers on all fronts, promising a delightful culinary experience that is both simple to execute and impressive to taste.
Ingredients:
- For the Chicken Tenders:
- 1.5 – 2 pounds boneless, skinless chicken tenders (about 12-16 pieces)
- 1 cup all-purpose flour
- 2 large eggs, whisked
- 2 cups Panko breadcrumbs (these create a superior crispiness in the air fryer!)
- 1 teaspoon salt
- ½ teaspoon black pepper
- 1 teaspoon garlic powder
- 1 teaspoon onion powder
- ½ teaspoon smoked paprika (optional, but adds a lovely color and subtle depth)
- Cooking spray or 1-2 tablespoons olive oil for air frying
- For the Honey Butter Garlic Sauce:
- ½ cup unsalted butter (1 stick)
- ¼ cup honey (adjust to your sweetness preference)
- 4-5 cloves garlic, minced (fresh garlic is non-negotiable here for the best flavor!)
- 1 tablespoon low-sodium soy sauce or Worcestershire sauce (for umami depth)
- ½ teaspoon red pepper flakes (optional, for a touch of heat)
- Pinch of salt, to taste
- For Garnish (Optional):
- Fresh parsley, chopped
- Toasted sesame seeds
Preparing the Chicken and Setting Up Your Breading Station
- Prepare the Chicken: First things first, let’s get our chicken tenders ready. Carefully remove the chicken tenders from their packaging. Sometimes, you’ll find a thin, white tendon running through the chicken tenders. While optional, I often recommend removing this for a more tender bite. You can do this by holding the tendon with a paper towel and scraping it off with a fork or knife. Pat the chicken tenders thoroughly dry with paper towels. This step is crucial for achieving crispy Air Fryer Honey Butter Garlic Chicken Tenders! Excess moisture leads to soggy breading, and we definitely don’t want that. Set the dried tenders aside.
-
Set Up Your Breading Station: To make the breading process smooth and efficient, we’ll set up a classic three-station dredging system. Grab three shallow dishes or pie plates that are wide enough to accommodate a chicken tender.
- Dish 1 (Flour): In the first dish, combine the all-purpose flour, 1 teaspoon salt, ½ teaspoon black pepper, 1 teaspoon garlic powder, 1 teaspoon onion powder, and ½ teaspoon smoked paprika (if using). Whisk these dry ingredients together until they are well combined. This seasoned flour will be our first layer of flavor and helps the egg stick better.
- Dish 2 (Egg Wash): In the second dish, crack the two large eggs and whisk them vigorously with a fork until the yolks and whites are fully combined and slightly frothy. This egg wash acts as the glue for our breadcrumbs.
- Dish 3 (Panko Breadcrumbs): In the third dish, pour the 2 cups of Panko breadcrumbs. Panko breadcrumbs are flakier and drier than regular breadcrumbs, which makes them exceptional for air frying because they get incredibly crispy without becoming greasy.
Make sure your workspace is tidy, with enough space for each dish and your chicken tenders. I always recommend having a designated “wet” hand and “dry” hand to minimize mess during the breading process.
Breading the Chicken Tenders for Optimal Crispiness
-
Breading the Chicken: Now for the fun part – breading our chicken! Take one chicken tender at a time and follow these steps:
- Flour First: Dredge the chicken tender completely in the seasoned flour mixture. Make sure it’s fully coated, then gently shake off any excess flour. We want a thin, even layer.
- Egg Wash Next: Dip the flour-coated chicken tender into the whisked egg wash, ensuring all sides are covered. Let any excess egg drip off briefly.
- Panko Last: Immediately transfer the egg-coated tender into the Panko breadcrumbs. Press the Panko firmly onto the chicken tender from all sides, ensuring it’s completely encrusted. Don’t be shy here; really press the breadcrumbs on. The more Panko that adheres, the crispier your “Air Fryer Honey Butter Garlic Chicken Tenders” will be!
- Repeat: Place the fully breaded chicken tender onto a clean plate or baking sheet. Repeat this process with the remaining chicken tenders until they are all beautifully breaded. For the best results, you can chill the breaded tenders in the refrigerator for about 15-20 minutes before air frying. This helps the breading adhere even better and prevents it from falling off during cooking.
Air Frying the Chicken Tenders to Golden Perfection
- Preheat Your Air Fryer: While your breaded tenders are chilling (if you opted for that step), it’s time to preheat your air fryer. I find that preheating is essential for achieving that perfectly crispy crust, similar to preheating an oven. Set your air fryer to 375°F (190°C) and let it preheat for 5 minutes. A preheated air fryer ensures an even cook and an immediate crisp on the outside.
- Arrange and Spray: Once your air fryer is preheated, lightly spray the air fryer basket with cooking spray or brush with a little olive oil. This prevents sticking and helps promote an even crisp. Carefully place the breaded chicken tenders in a single layer in the air fryer basket. It’s crucial not to overcrowd the basket. Overcrowding will steam the chicken instead of frying it, resulting in a less crispy texture. Depending on the size of your air fryer, you will likely need to cook these in two or three batches. Give each tender a light spray of cooking oil or olive oil on top as well. This extra bit of fat helps the Panko turn golden brown and extra crunchy.
-
Air Fry for Crispiness: Cook the chicken tenders in the preheated air fryer at 375°F (190°C).
- First Side: Air fry for 8-10 minutes. At this point, the breading should be starting to turn golden brown and feel firm.
- Flip and Finish: After the initial cooking time, carefully flip each chicken tender using tongs. Spray the newly exposed side with a little more cooking spray or oil. Continue to air fry for another 5-7 minutes, or until the chicken is golden brown, crispy, and cooked through.
Internal Temperature Check: To be absolutely sure your chicken tenders are done and safe to eat, use an instant-read meat thermometer. The internal temperature of the thickest part of the chicken should reach 165°F (74°C). Cooking times can vary slightly depending on the thickness of your chicken tenders and the specific model of your air fryer, so always monitor closely. When they’re perfectly golden and cooked, remove them from the air fryer and set them aside on a wire rack while you cook the remaining batches. This prevents the bottom from getting soggy.
Crafting the Irresistible Honey Butter Garlic Sauce
- Melt the Butter: While your final batch of chicken tenders is air frying, or immediately after they are all cooked, it’s time to whip up the star of the show: our luscious honey butter garlic sauce. In a small saucepan or skillet, melt ½ cup (1 stick) of unsalted butter over medium-low heat. Keep an eye on it to ensure it doesn’t burn.
- Sauté the Garlic: Once the butter is fully melted and slightly shimmering, add the 4-5 cloves of minced fresh garlic to the pan. Sauté the garlic for about 1-2 minutes, stirring frequently. We want the garlic to become fragrant and slightly softened, but be careful not to burn it, as burnt garlic can taste bitter. Keep the heat relatively low to avoid this. The aroma filling your kitchen will be incredible at this stage!
- Add Honey and Umami: Reduce the heat to low. Stir in the ¼ cup of honey. You can adjust the amount of honey here to suit your preference for sweetness – a little more if you like it sweeter, a little less if you prefer a more savory balance. Next, add the 1 tablespoon of low-sodium soy sauce or Worcestershire sauce. This ingredient is key for adding a wonderful depth of umami flavor that balances the sweetness of the honey and richness of the butter. If you’re a fan of a little kick, now is the time to stir in the ½ teaspoon of red pepper flakes. Finally, add a pinch of salt to taste, as the butter and soy sauce already contribute some salinity.
- Simmer and Thicken: Gently stir all the ingredients together until they are well combined and the sauce is smooth and emulsified. Let the sauce simmer on low heat for 2-3 minutes, stirring occasionally. This simmering time allows the flavors to meld beautifully and the sauce to thicken slightly. It should be a glossy, aromatic, and perfectly balanced sauce ready to coat our crispy “Air Fryer Honey Butter Garlic Chicken Tenders”.
Tossing and Serving Your Delectable Chicken Tenders
- Toss with Sauce: Once all your crispy air-fried chicken tenders are ready and still warm, transfer them to a large mixing bowl. Pour the warm honey butter garlic sauce directly over the chicken tenders. Using tongs, gently toss the chicken tenders until each piece is thoroughly coated in the glorious, sticky, and fragrant sauce. Make sure every nook and cranny gets covered in that beautiful glaze! The warmth of the chicken will help the sauce adhere perfectly.
- Garnish and Serve Immediately: Transfer the sauced “Air Fryer Honey Butter Garlic Chicken Tenders” to a serving platter. If you’re using optional garnishes, sprinkle generously with freshly chopped parsley for a pop of color and freshness, and toasted sesame seeds for an extra nutty crunch. These tenders are best served immediately while they are hot and the sauce is perfectly glossy.
- Enjoy! These tenders make an amazing main course with a side of rice or a fresh salad, or they can be served as an incredibly popular appetizer. The combination of crispy chicken, sweet honey, rich butter, and pungent garlic is simply irresistible. This dish truly highlights how versatile and delicious chicken tenders can be, especially when prepared in the air fryer for maximum crispness and then enveloped in such an amazing sauce. Get ready for rave reviews!
Conclusion:
Well, my friends, we’ve reached the end of our culinary journey for today, and I truly hope you’re as excited about this recipe as I am. If there’s one dish I could urge you to add to your weekly rotation, it’s this one. The sheer simplicity of creating something so utterly delicious in your own kitchen is a joy that truly needs to be experienced. We’re talking about chicken tenders that emerge from the air fryer not just cooked, but transformed – boasting an incredible exterior that’s perfectly crisp, giving way to incredibly juicy, tender meat inside. What sets this recipe apart, making it a definitive must-try, is the magical fusion of flavors that the honey, butter, and garlic create. It’s a symphony of sweet and savory notes, with that irresistible pungency of garlic shining through without being overpowering. It strikes that perfect balance, making it a universal crowd-pleaser that even the pickiest eaters will adore. No more greasy, deep-fried options when you can have this healthier, quicker, and frankly, much more flavorful alternative. It truly elevates a humble chicken tender to something special.
This isn’t just a meal; it’s a testament to how easy and rewarding cooking can be when you have the right tools and the right recipe. The minimal cleanup, the hands-off cooking time thanks to the air fryer, and the consistently spectacular results make the Air Fryer Honey Butter Garlic Chicken Tenders a recipe you’ll find yourself returning to again and again. It’s perfect for a busy weeknight when you need something quick yet satisfying, impressive enough for casual guests, and fantastic for meal prepping lunches throughout the week. The crispy texture combined with the sticky, flavorful glaze is what makes this dish utterly irresistible, setting it miles apart from any other chicken tender recipe you might have tried before.
Elevate Your Plate: Serving Suggestions & Creative Twists
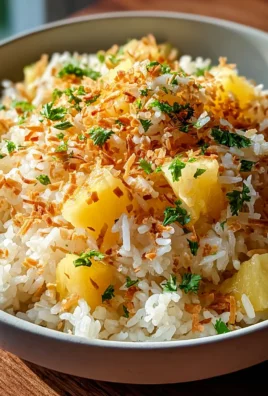
Now, let’s talk about how to make these delightful tenders an even bigger star on your plate. While they’re absolutely fantastic on their own, begging to be devoured straight from the air fryer, pairing them with the right sides can transform your meal. For a classic comfort food experience, I love serving them alongside a generous portion of fluffy mashed potatoes or some crispy sweet potato fries. A vibrant green salad tossed with a light vinaigrette also makes for a wonderful counterpoint, offering a fresh, crisp texture that balances the richness of the chicken. If you’re looking for something a bit heartier, try them over a bed of jasmine rice, allowing that glorious honey butter garlic sauce to seep into every grain, or even alongside some creamy macaroni and cheese for a truly indulgent treat.
But don’t stop there! The versatility of these tenders is truly remarkable. Imagine them sliced and tucked into warm tortillas with a dollop of sour cream and some fresh salsa for incredible chicken tacos, or chopped and added to a fresh Caesar salad for a protein-packed lunch. They make excellent sandwich fillings too – think a crusty baguette with lettuce, tomato, and a smear of aioli. And for those who love to experiment, feel free to play with the flavor profile. A sprinkle of red pepper flakes in the glaze before cooking will add a delightful kick for those who like a little heat. A squeeze of fresh lime or lemon juice right after they come out of the air fryer can brighten the entire dish, adding a zesty finish. You could even experiment with different herbs; a little fresh thyme or rosemary could introduce an entirely new aromatic dimension. For a cheesy twist, a sprinkle of grated Parmesan during the last minute of cooking would create a lovely savory crust. The possibilities are truly endless, allowing you to tailor this fantastic recipe to your exact cravings.
Your Turn: Experience the Flavor!
So, there you have it. My heartfelt recommendation. I genuinely believe that once you try this recipe, you’ll understand exactly why I’m so enthusiastic about it. It’s an easy win in the kitchen, offering maximum flavor with minimal fuss. Don’t just take my word for it; go ahead and give these incredibly delicious chicken tenders a try this week. I promise you won’t regret it. Cooking should be an adventure, a source of joy, and this recipe delivers on all fronts. I’m truly excited for you to experience the magic of perfectly cooked, unbelievably flavorful chicken tenders made right in your own air fryer. And when you do, please, please share your experience! I absolutely adore hearing about your kitchen adventures, your successes, and any fun variations you come up with. Let me know how they turn out for you!
Best Air Fryer Honey Butter Garlic Chicken Tenders
Air Fryer Honey Butter Garlic Chicken Tenders are about to become your new weeknight obsession. Imagine sinking your teeth into incredibly tender chicken, encased in a golden, crispy coating, all drenched in a harmonious glaze that’s sweet, savory, and exquisitely garlicky. It’s a symphony of flavors and textures that truly elevates the humble chicken tender into something spectacular.
Ingredients
Instructions
Important Information
Nutrition Facts (Per Serving)
It is important to consider this information as approximate and not to use it as definitive health advice.
Allergy Information
Please check ingredients for potential allergens and consult a health professional if in doubt.


Leave a Comment